Quickstart
Supported Devices
For a complete list of all supported devices including Fixed Retail Scanners, Handheld Scanners, Mobile Devices and their supported commands, see the Supported Devices page.
Install Aladdin SDS
Before installing AladdinSDS version 1.1.2 or later, make sure to uninstall any AladdinSDS version lower than 1.1.2 and the Device Integration Gateway (DIG) if present on the machine. Leaving old versions installed may cause conflicts, duplicate device registrations, or unexpected behaviour.
Follow these steps to run the Aladdin SDS as a Windows Service:
-
Download the .msi installer from Aladdin SDS Installer.
-
Run the installer and follow the instructions provided.
-
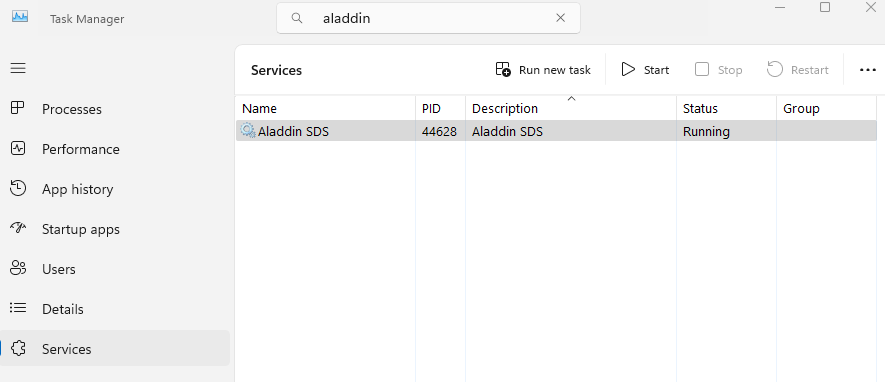
Check if service is running in the task manager:
-
Open the
config.tomlfile located atC:\ProgramData\Datalogic\AladdinSDS\config.tomland set the Edge host address:[edge]
host = "<YOUR_EDGE_IP_ADDRESS>"Replace
<YOUR_EDGE_IP_ADDRESS>with the IP address or hostname of your Edge gateway. For more details on all available configuration options, see the AladdinSDS Configuration page. -
Restart the Aladdin SDS service to apply the configuration changes. You can do this from the Windows Services panel (
services.msc) by finding AladdinSDS, right-clicking it and selecting Restart. -
Connect the Datalogic device to the POS system or the industrial PC.
-
Read the device serial number using the OpenAPI documentation page.
-
Click on the
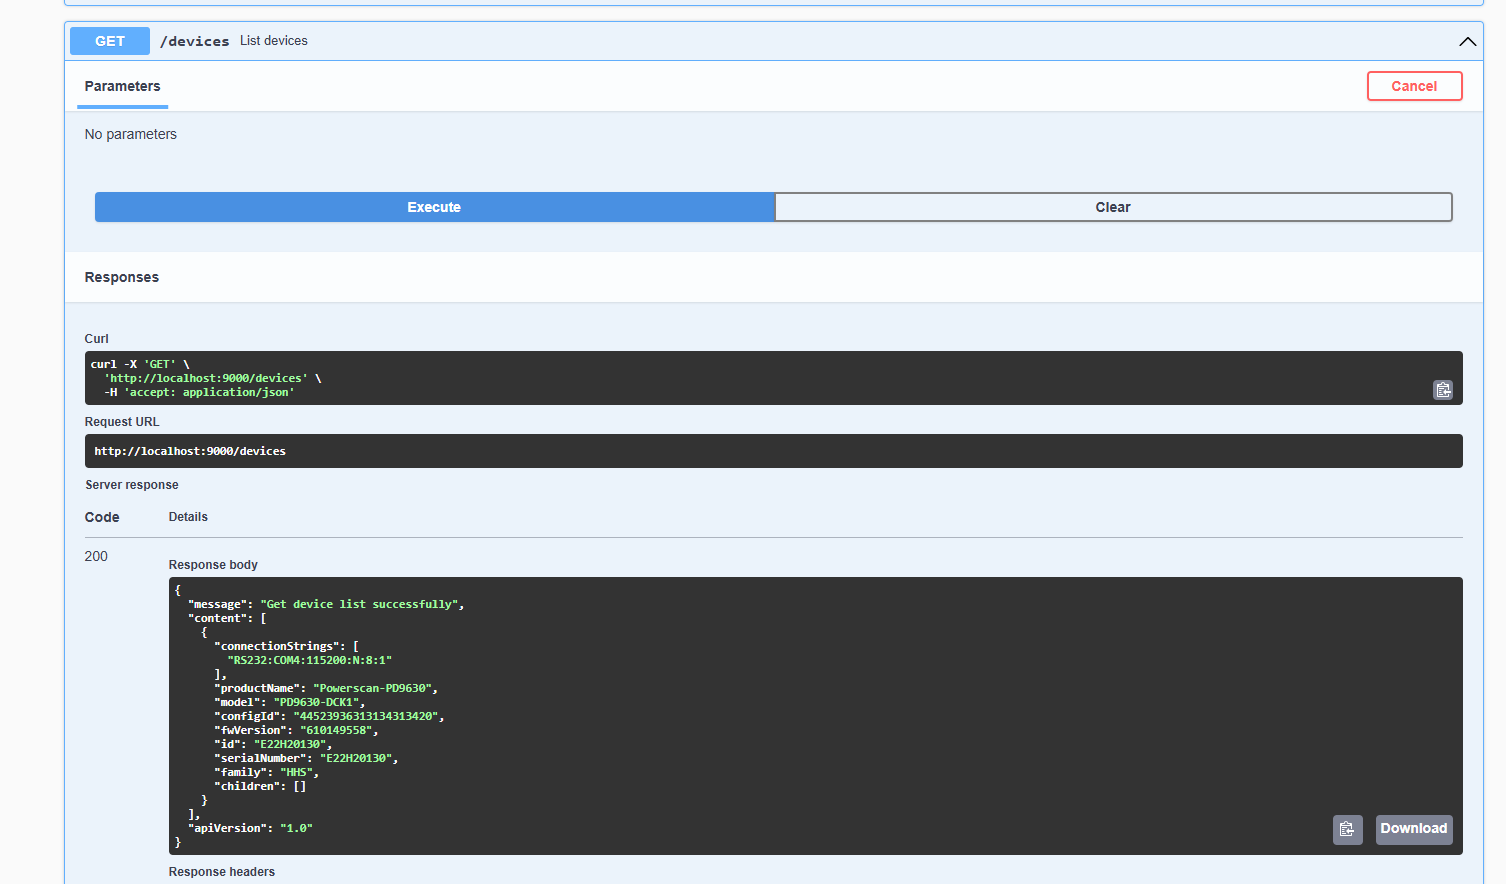
GET /devicesbutton, then click on theTry it outbutton and finally click on theExecutebutton: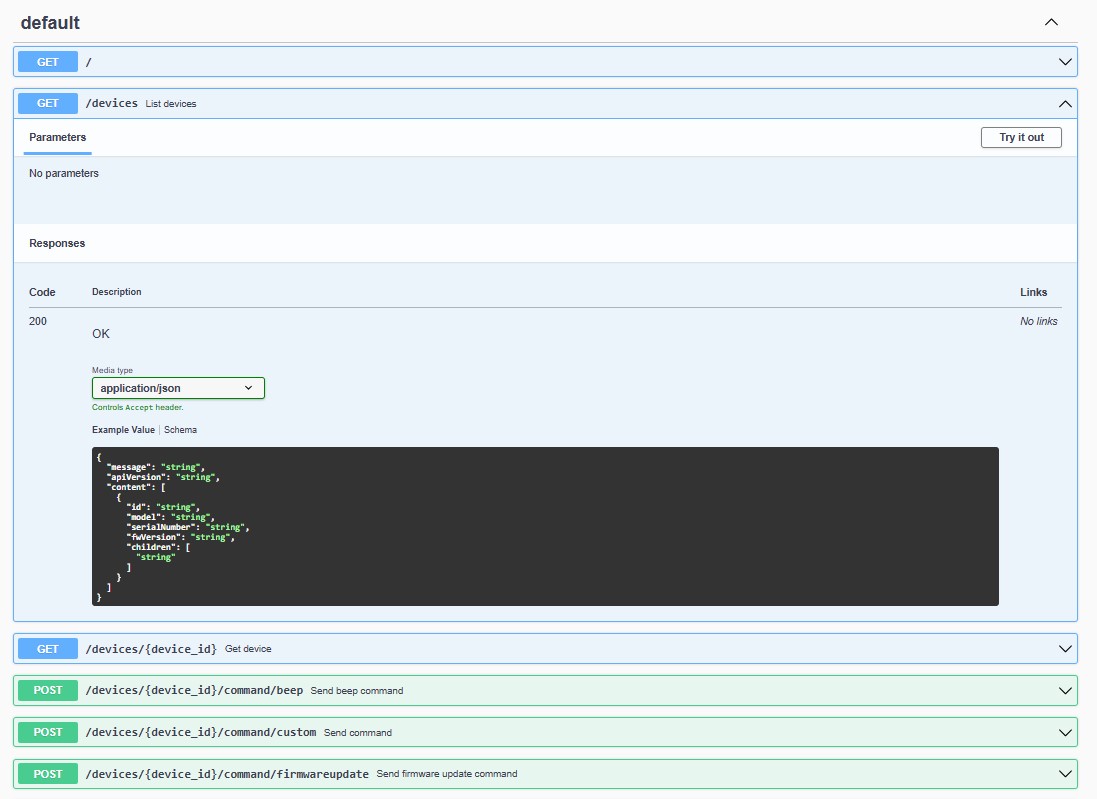
-
The response will show the device serial number of the devices connected. In the example below, there are two devices connected to the POS system: annotate the id of the devices that you want to add to the platform (in the example below, E22H20130):
Device Smart Enrollment
-
Log in to the platform using the credentials provided:

-
Click on the
Device Visibilitysection: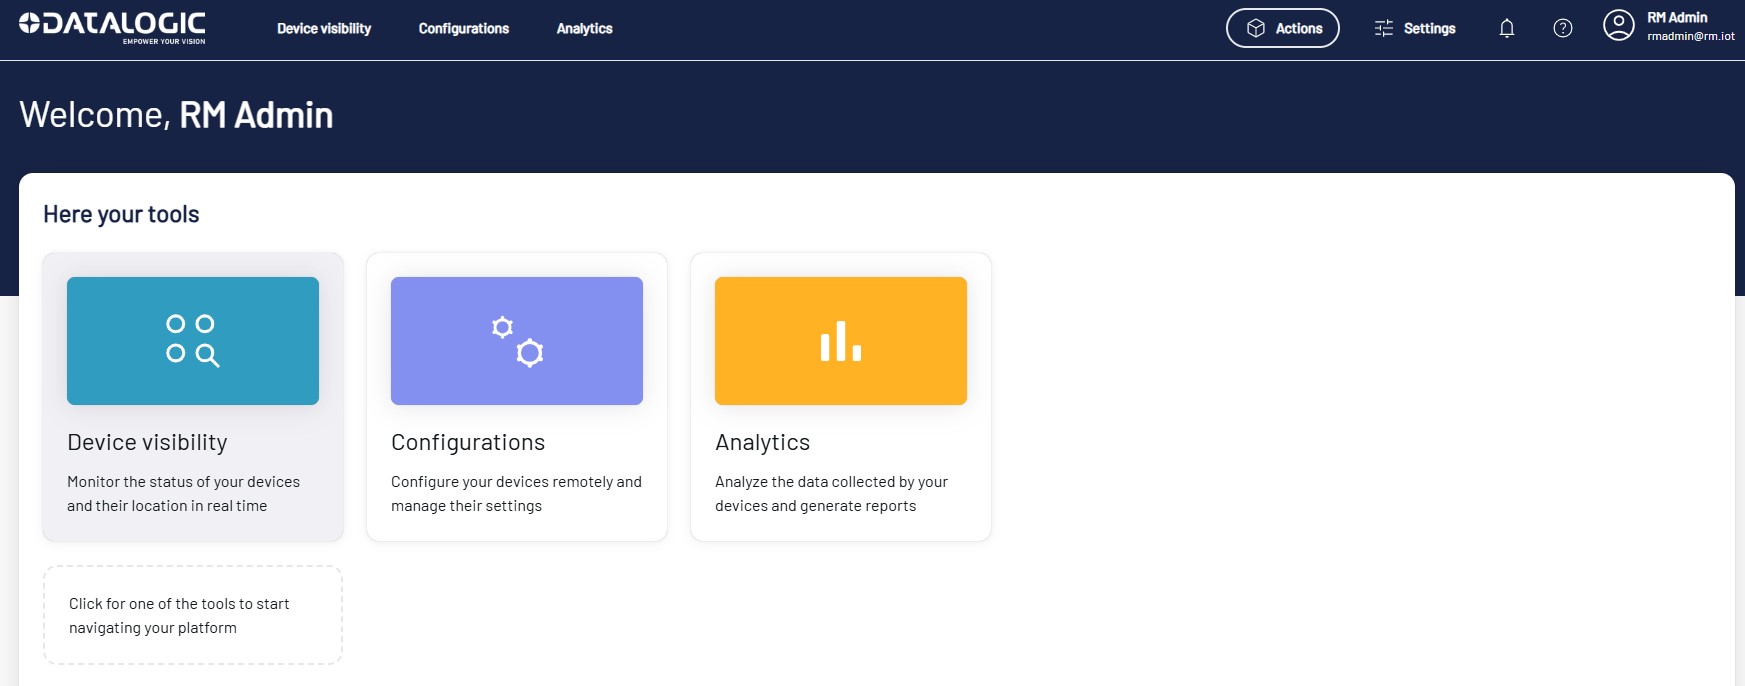
-
In the Device Visibility page, the POS (host device) and the Datalogic device should be visible with the status
To be approved.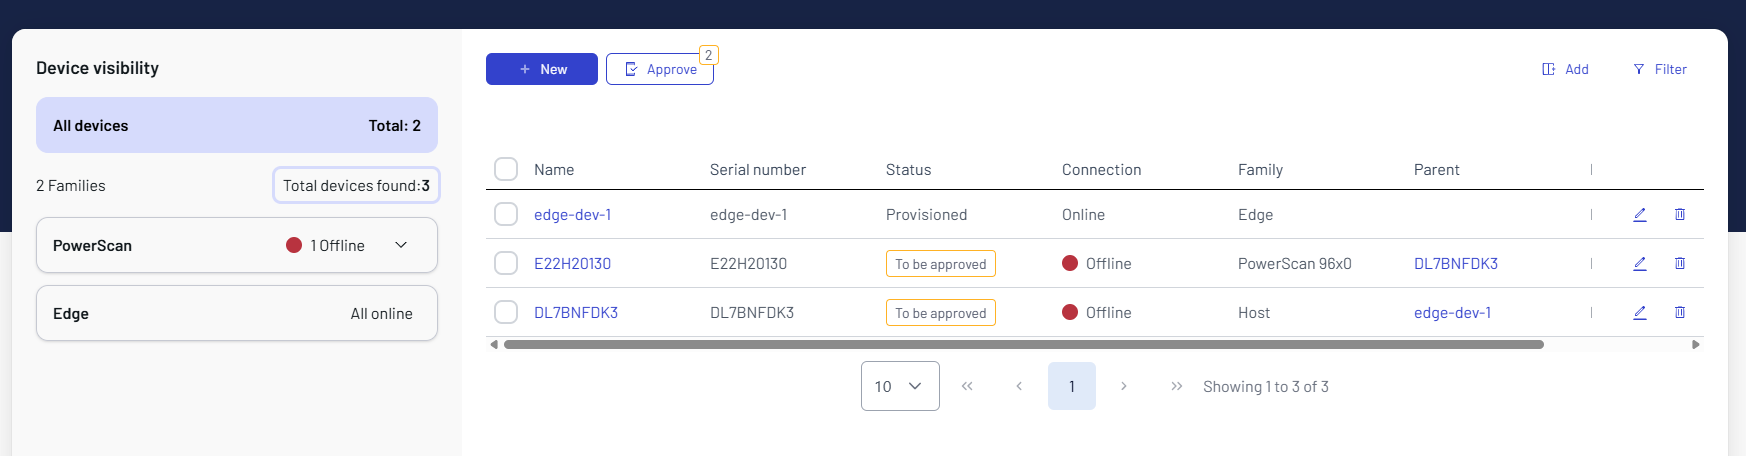
-
Clicking on the
Approvebutton will take you to the Device Approval page where you can add the device to the platform: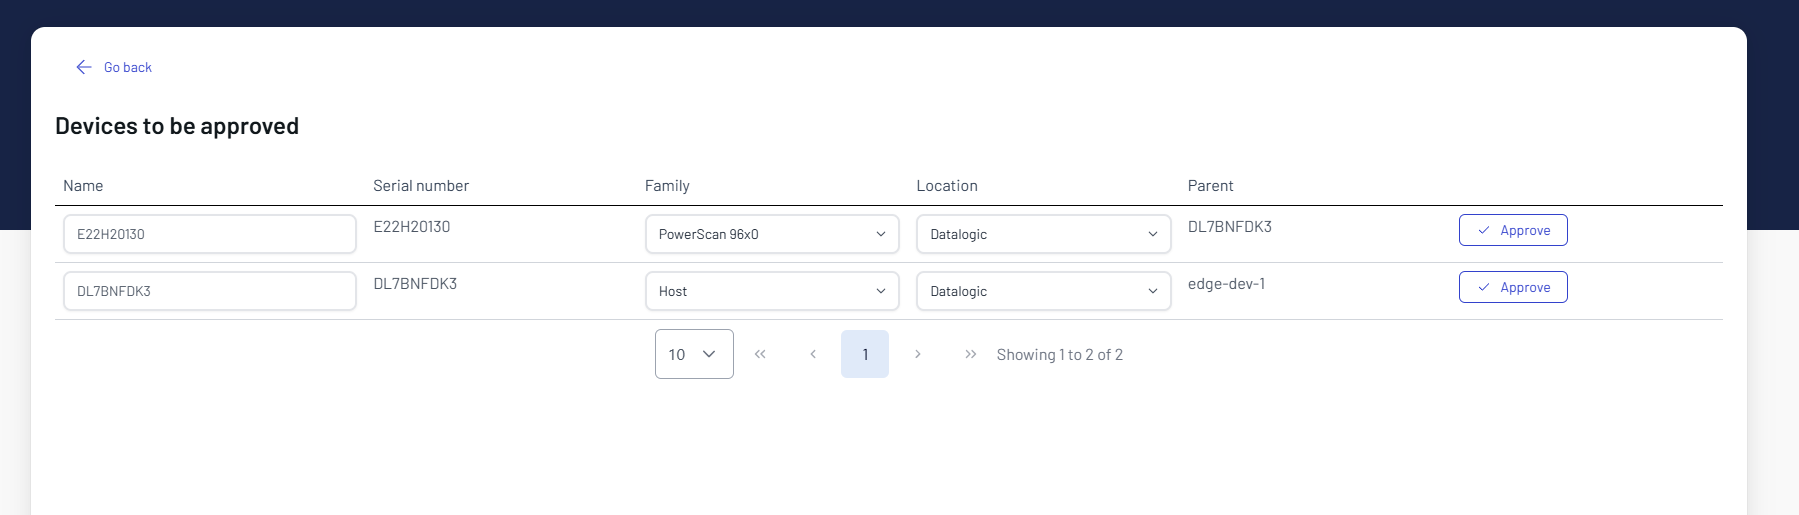
-
Check the device details and click on the
Approvebutton to add the device to the platform:- Device Category: Select the device category from the dropdown (e.g., PowerScan 96x0).
- Device Location: Select the location from the dropdown list (e.g., Datalogic)
- Serial Number: Enter the device serial number (e.g., E22H20130).
- Device Name: Enter a name for the device (e.g., Powerscan_01).
After clicking the
Approvebutton, the device will be added to the platform and you will be redirected to the Device Visibility page. -
The device will now be visible in the platform with the connection
offlineand status 'Registered':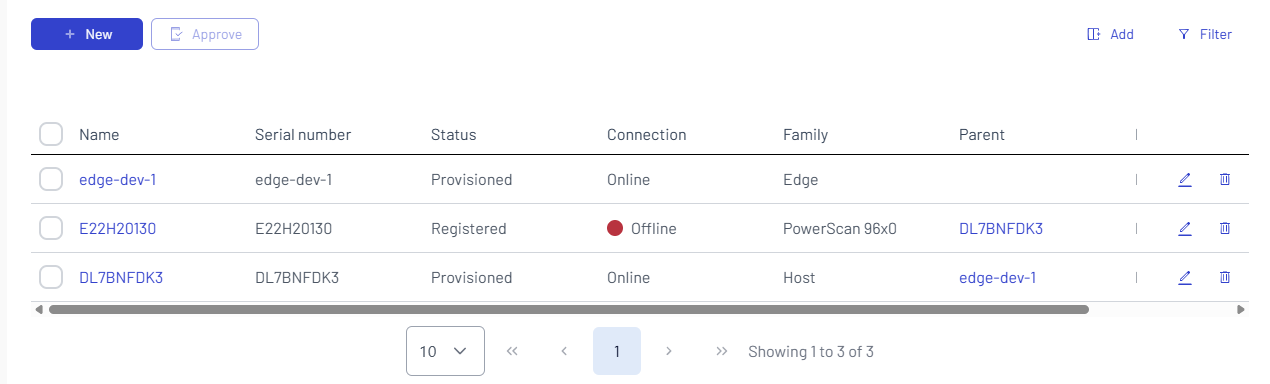
-
The device will automatically connect to the platform in a few minutes, changing the connection status to
onlineand the device status toProvisionedand reporting device information and telemetry data in the device details page.