Enroll a Mobile Device in Datalogic Connect
Supported Devices
For a complete list of supported mobile devices and their available commands, see Supported Devices.
Prerequisites
Before you begin, you need:
- A Windows computer with Scan2Deploy Studio 2.8.0-alpha.1 or later:
- A supported Android 11 or later mobile device with these components:
- Logger 1.5.0 or later
- S2D Agent 2.8.0 or later
- A functioning edge device deployed in Datalogic Connect. You must know its IP address.
- The Wi-Fi network name (SSID), encryption mode, and password for the mobile device.
Installation Steps
Step 1: Create a New Profile
- Open Scan2Deploy Studio
- Select Create Profile
- On the Action Selection page, select Applications
Step 2: Configure Wi-Fi
- Add a Wi-Fi network
- Enter the network SSID
- Select the appropriate Encryption Mode
- Enter the network password
Step 3: Add Connect Client
- On the Add Application for Install page, select Connect Client
- Select the application status control until the green Add (+) icon appears
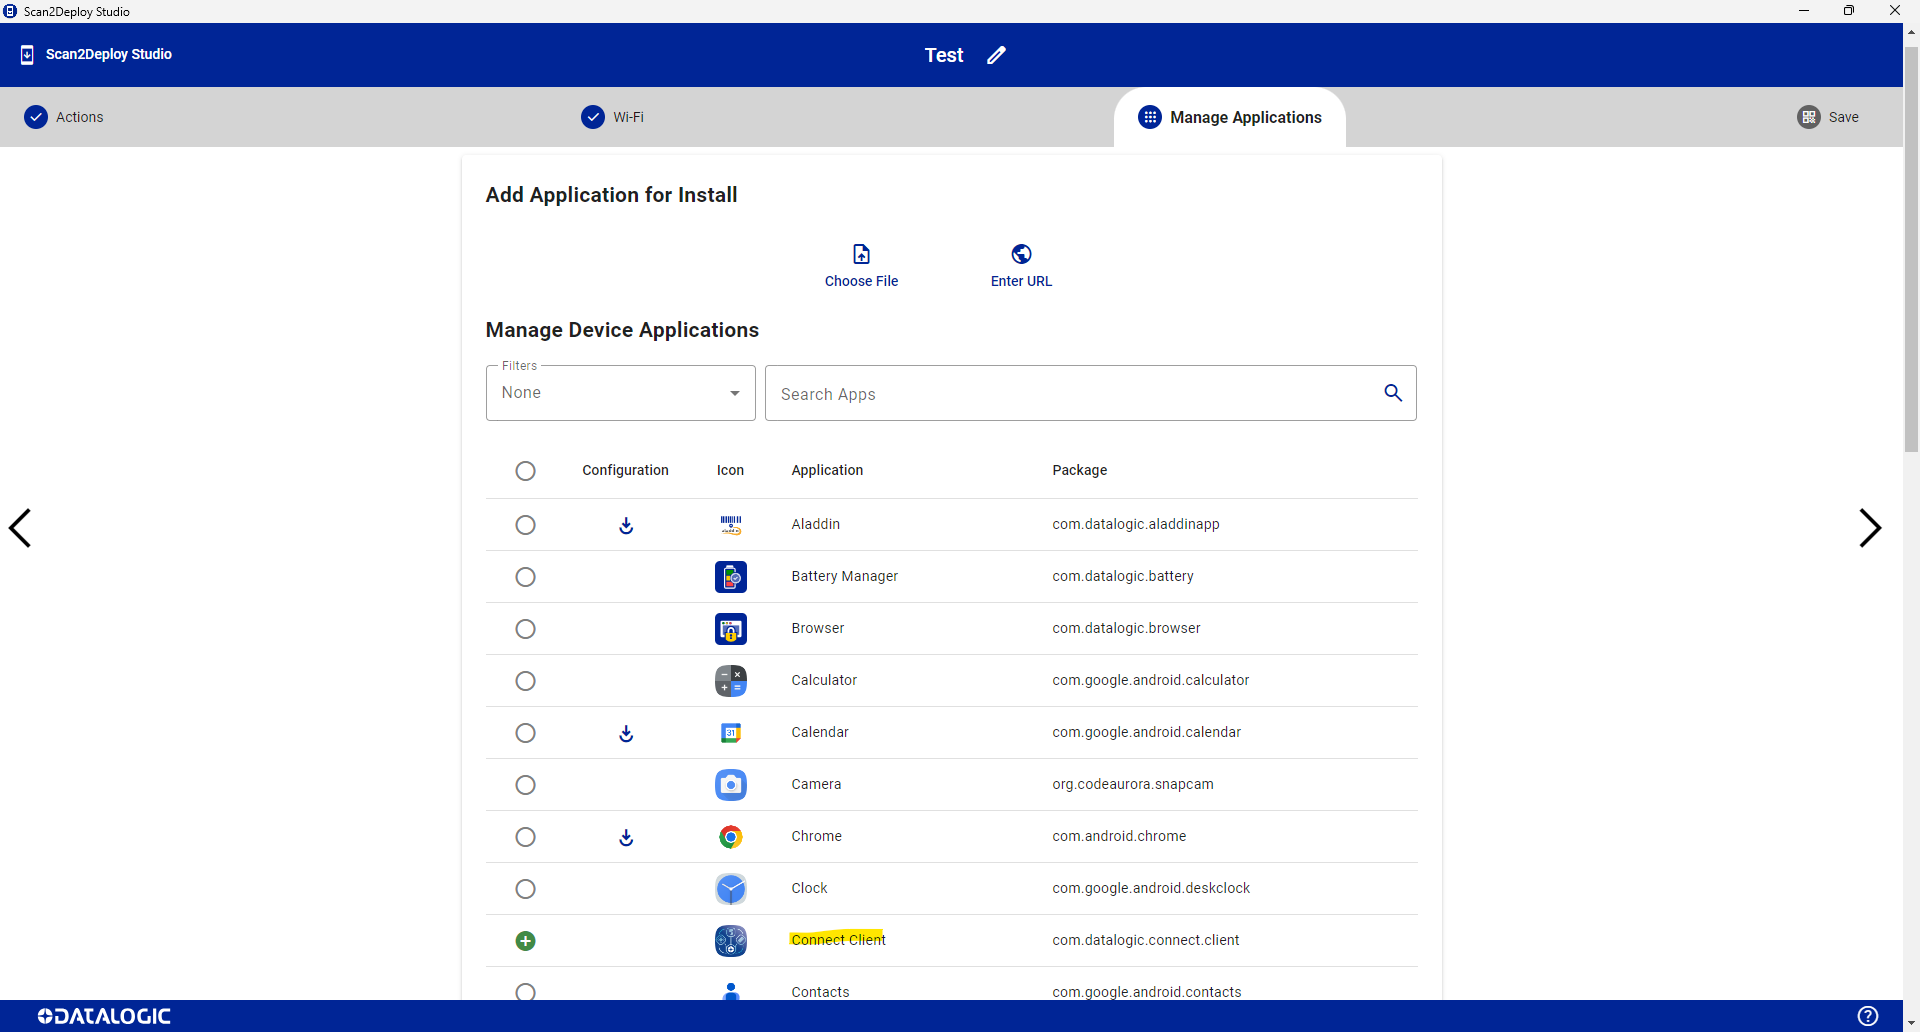
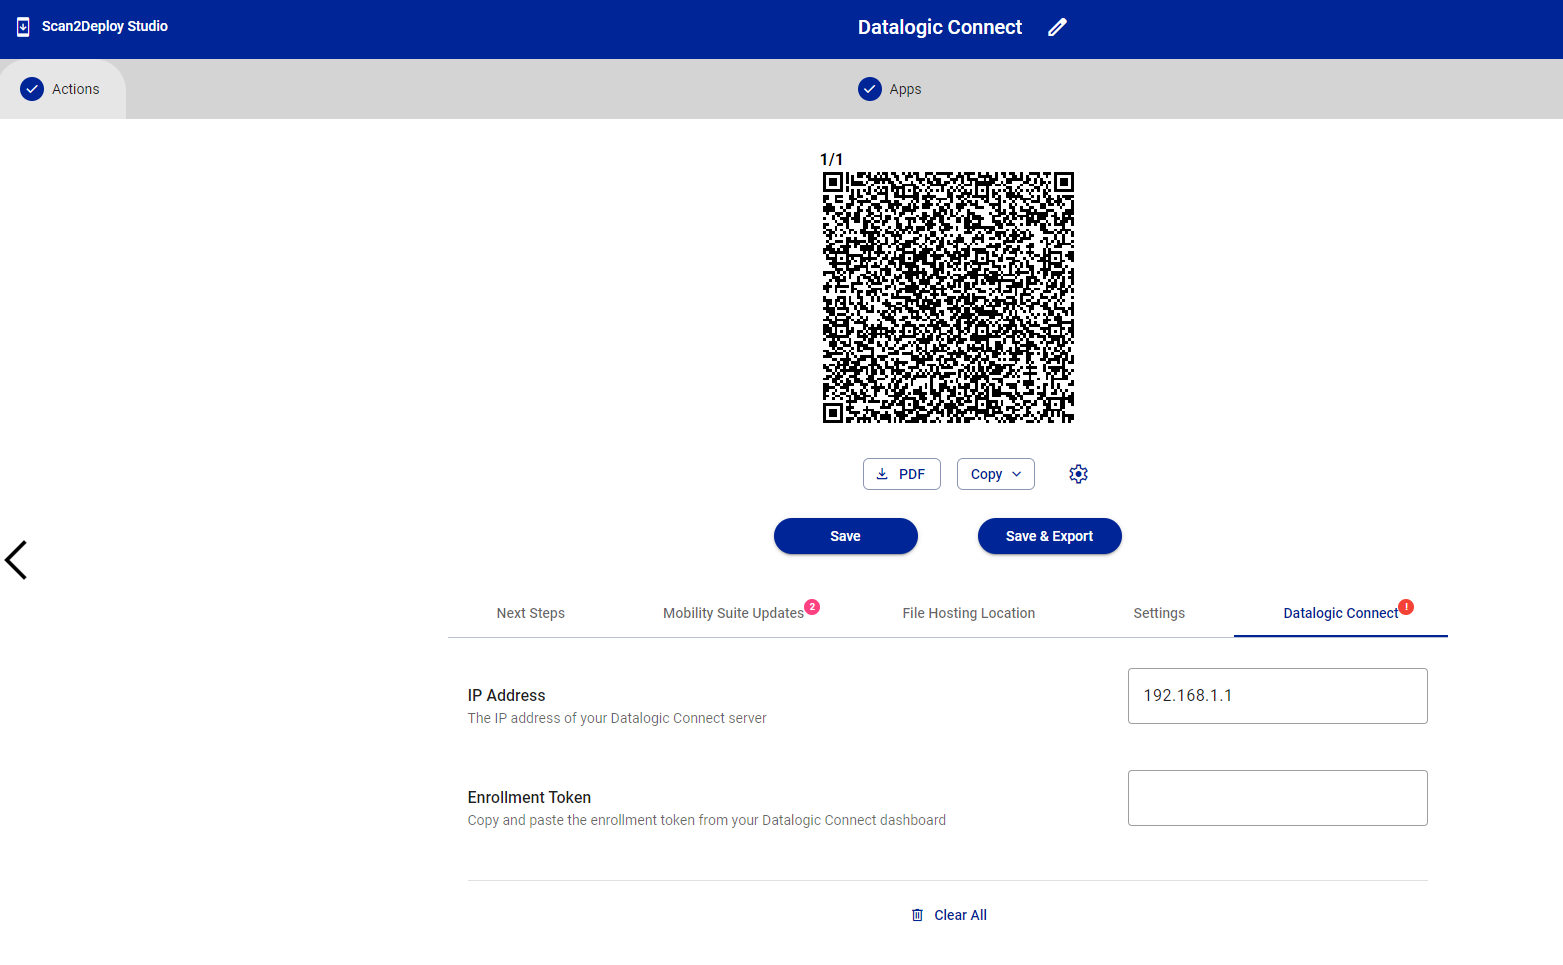
Step 4: Configure Datalogic Connect
On the final QR-code generation page:
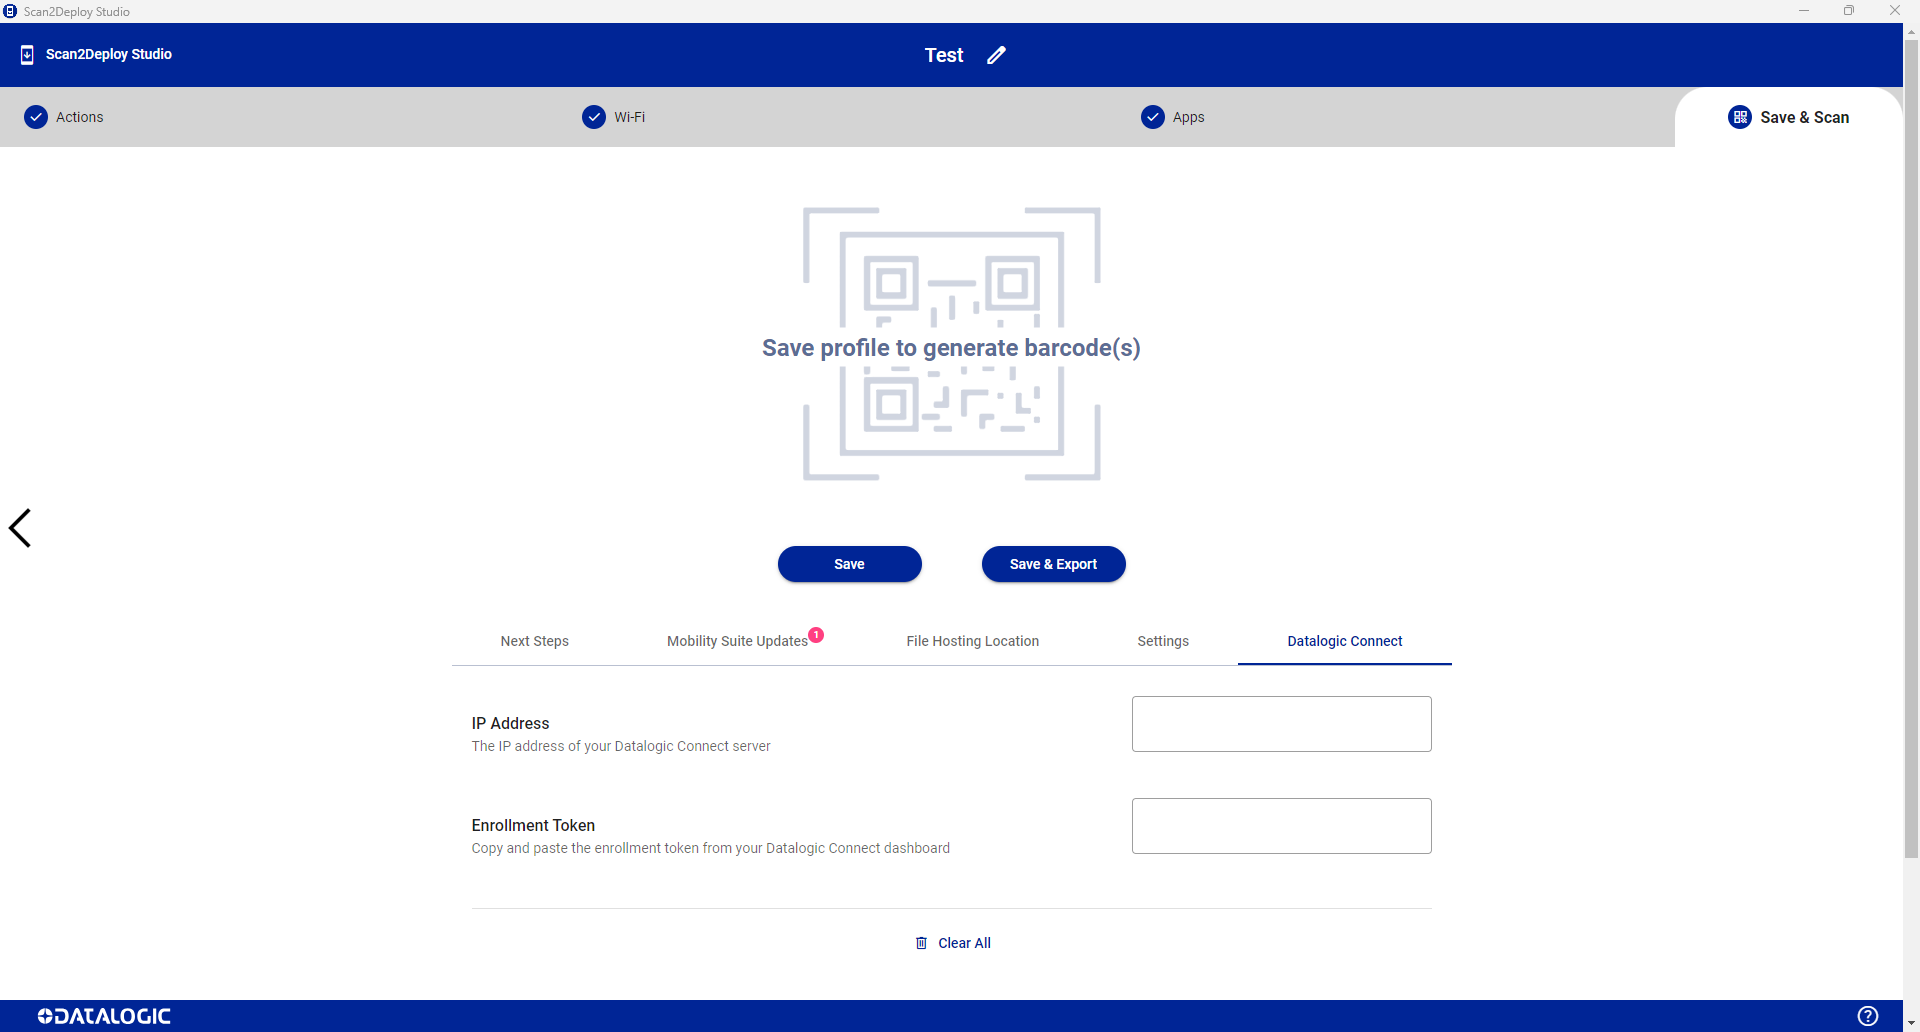
- Open the Datalogic Connect tab
- In IP Address, enter the IP address of your edge device
- If your deployment requires an enrollment token, paste it into Enrollment Token
- Obtain the token from the Datalogic Connect dashboard
- See Edge Device Commands for instructions on generating or copying an enrollment token
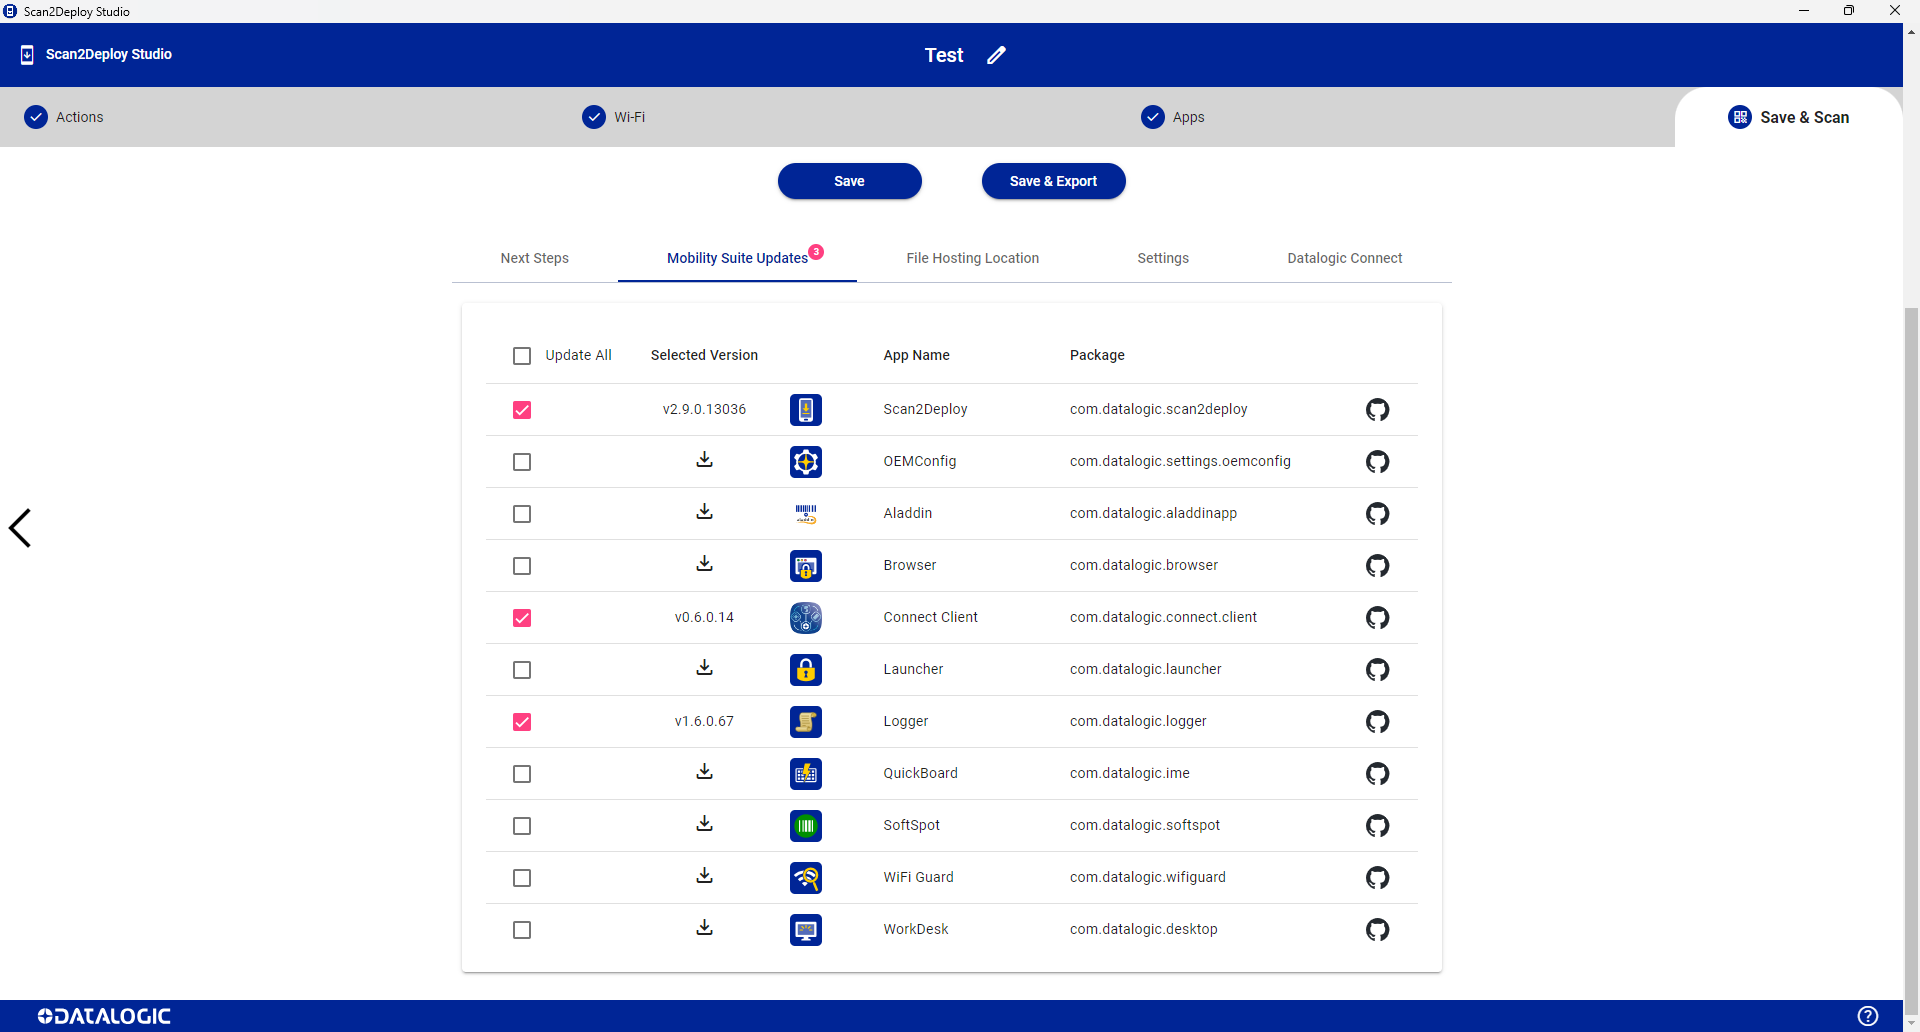
- Open the Mobility Suite Updates tab
- Select Connect Client, Logger, and Scan2Deploy so that the device downloads current versions
- Verify that Logger and S2D Agent meet the minimum versions listed in Prerequisites. Logger collects diagnostic information from the device.
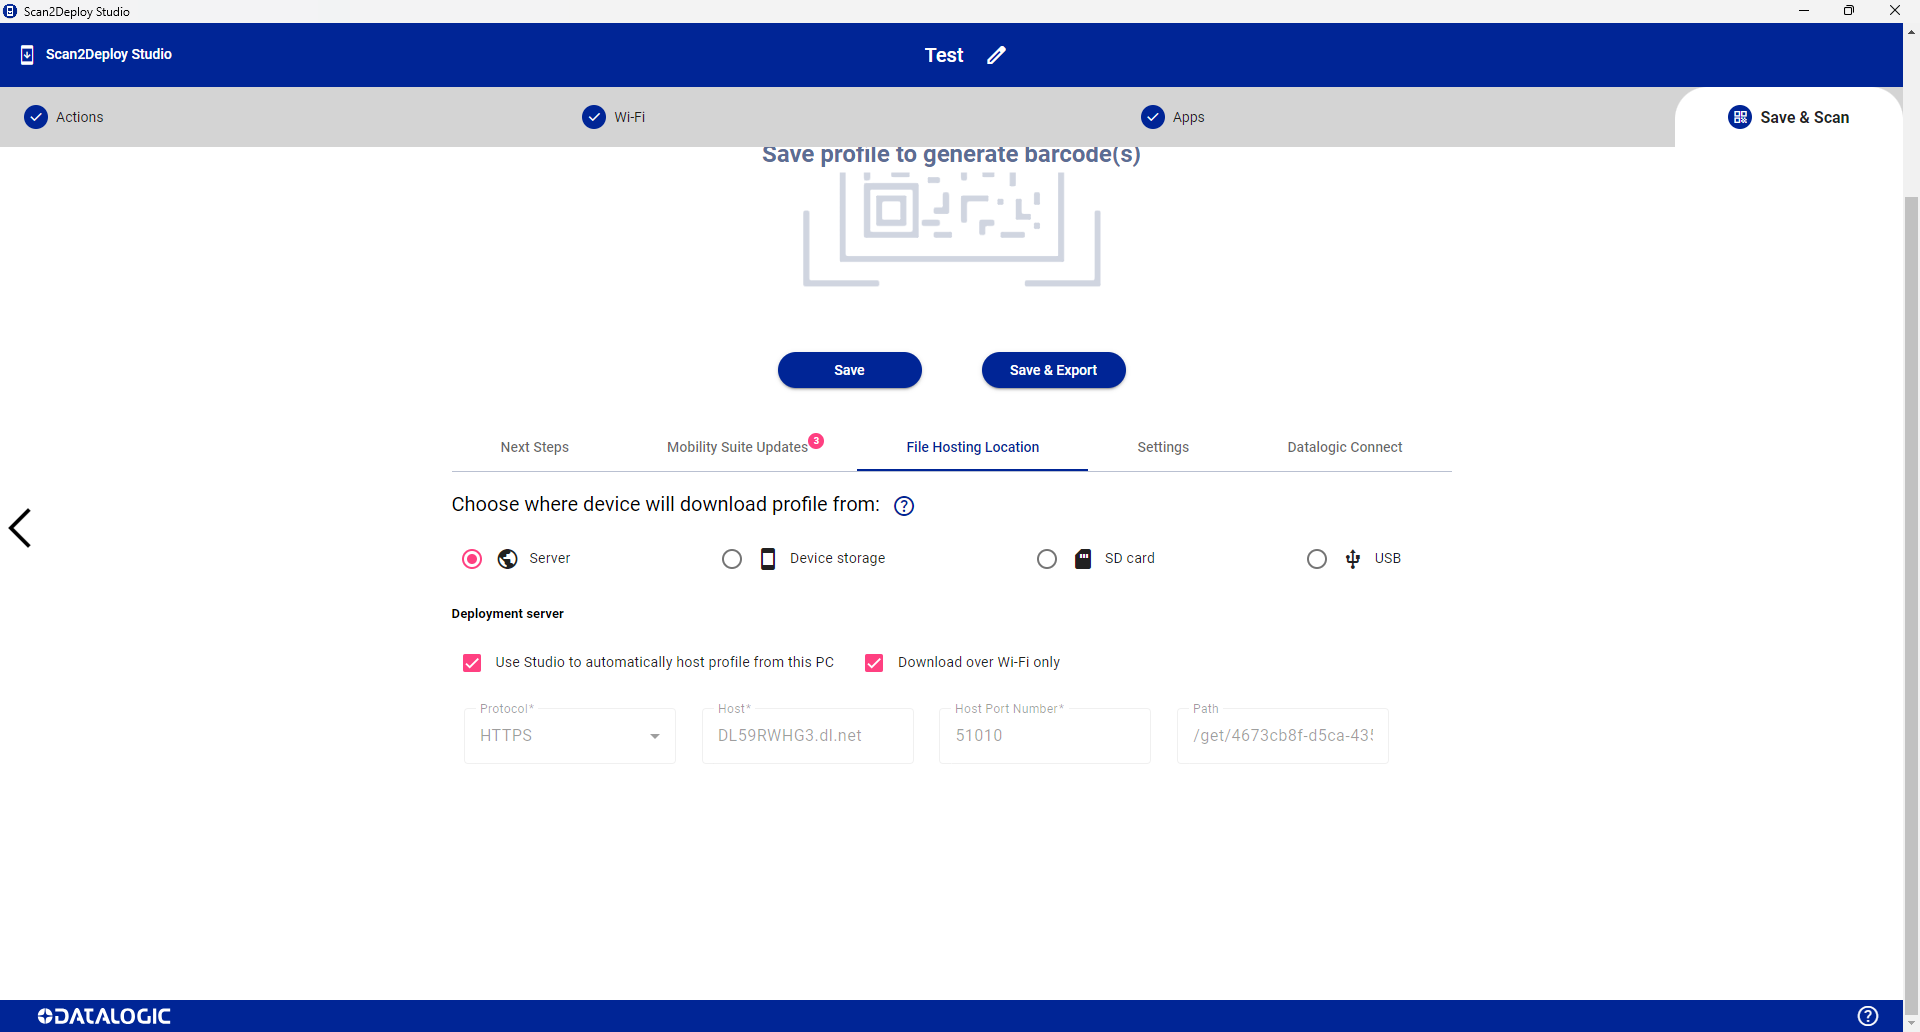
- Open the File Hosting Location tab
- Select Server
- Under Deployment server, select:
- Use Studio to automatically host profile from this PC
- Download over Wi-Fi only
Step 5: Generate and Scan QR Code
Once you have completed the profile configuration:
- Select Save or Save & Export to finalize the configuration
- Scan the generated QR code with the mobile device
- Wait for the profile to be applied and for Connect Client to be installed
Verify Device Approval
After the device processes the QR code, it appears on the Device Visibility page with the To be approved status:
- Open Device Visibility
- Find the device with the To be approved status
- Select Approve
- Confirm that the device status changes and that the device connects to Datalogic Connect
Next Steps
After enrollment and approval, the mobile device can:
- Receive and execute commands
- Apply device configurations
- Report device data and events