Device List
The Device List provides a comprehensive view of your connected devices. For supported device families, models, firmware versions, and feature availability, see Supported Devices.
From the Device Visibility home page, you can have an overview of all the devices registered to the platform, filter them by family, and manage their visibility.
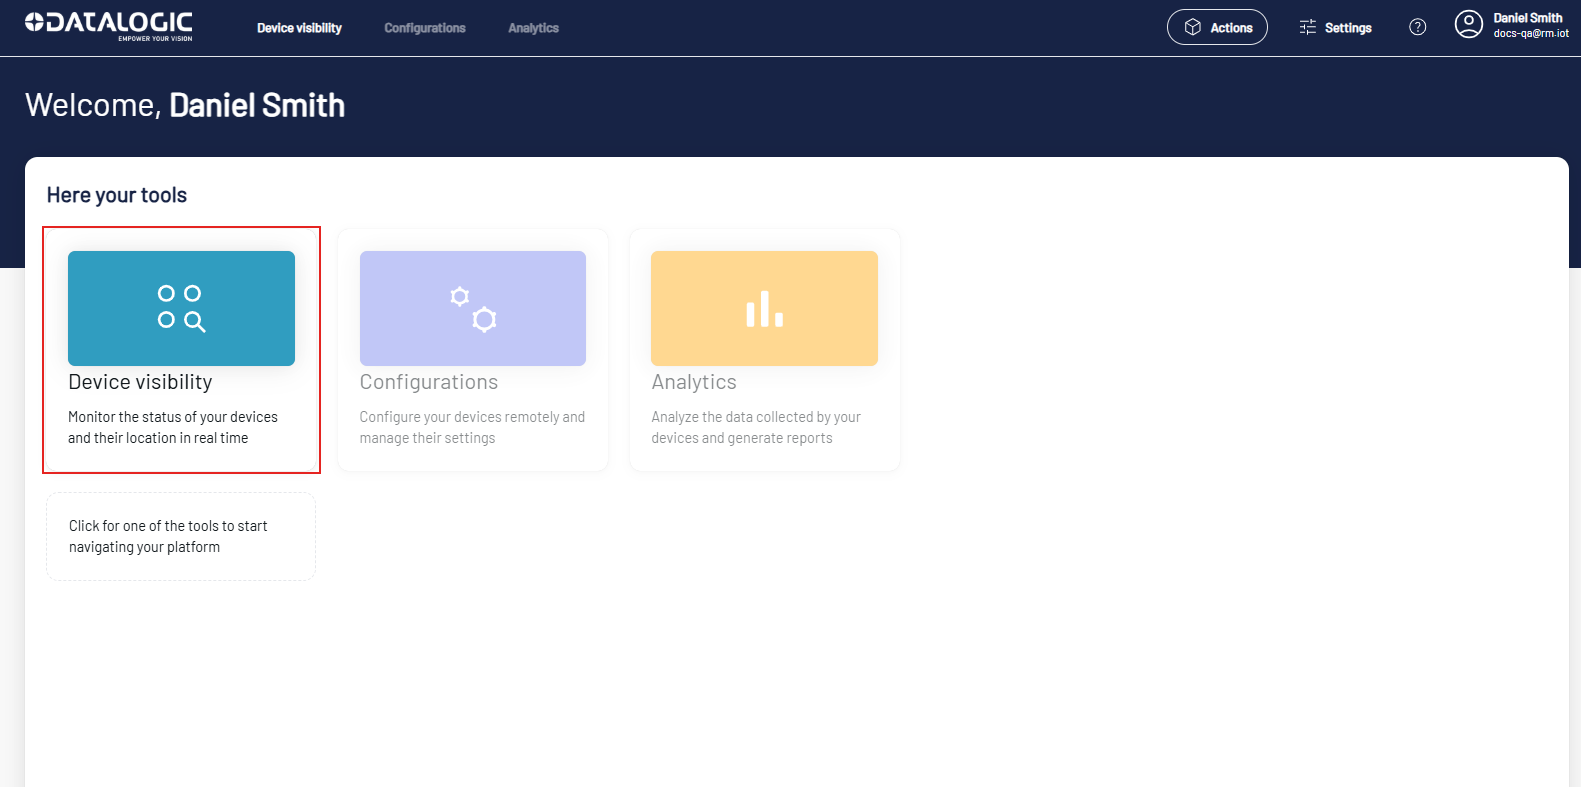
Click the Device Visibility button to open the Device List page.
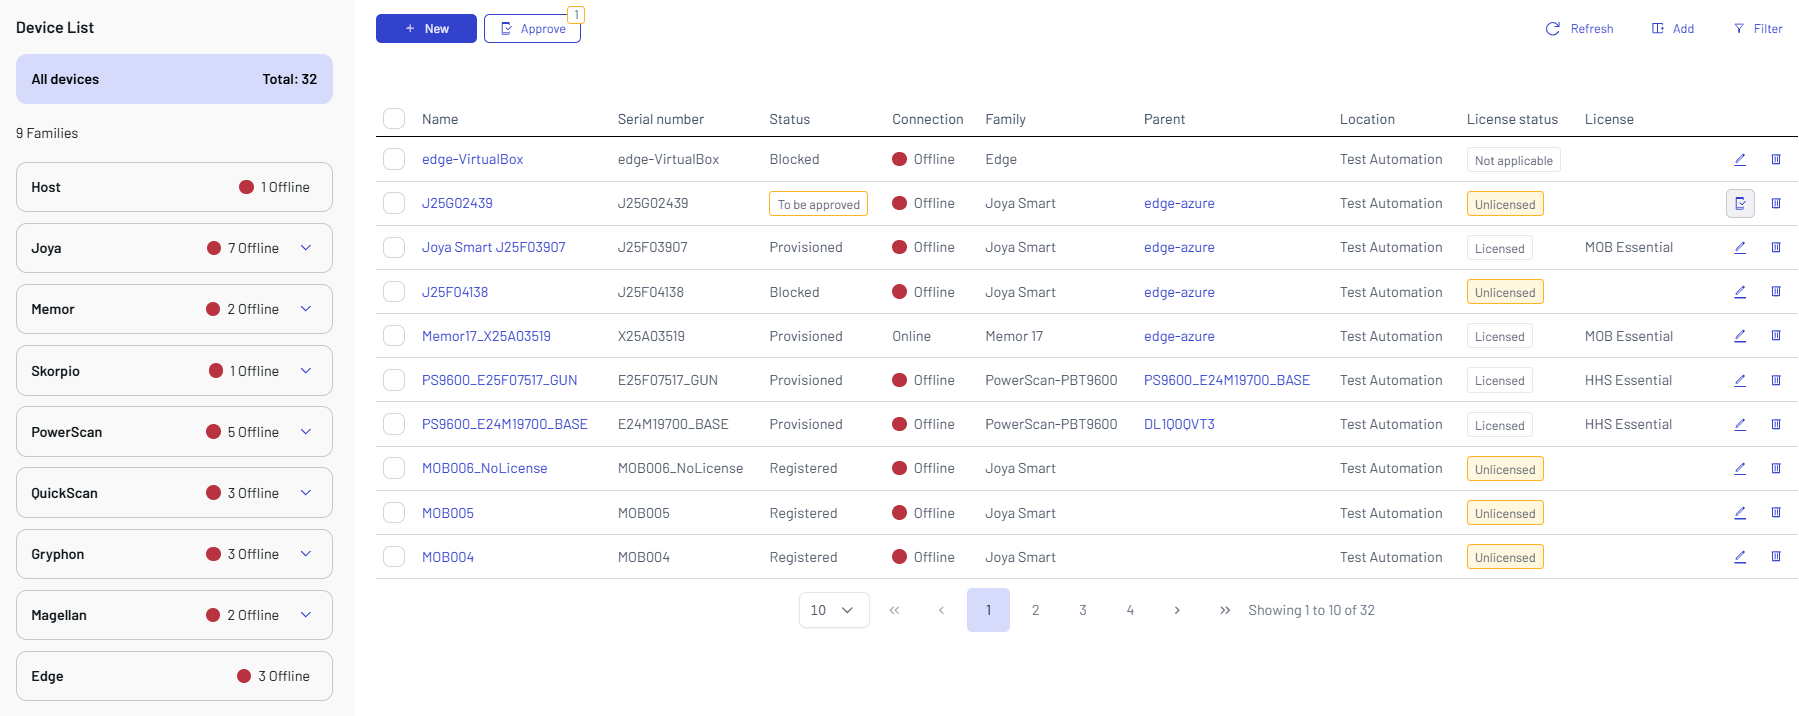
The Device List shows all devices registered to the platform and lets you add or remove them.
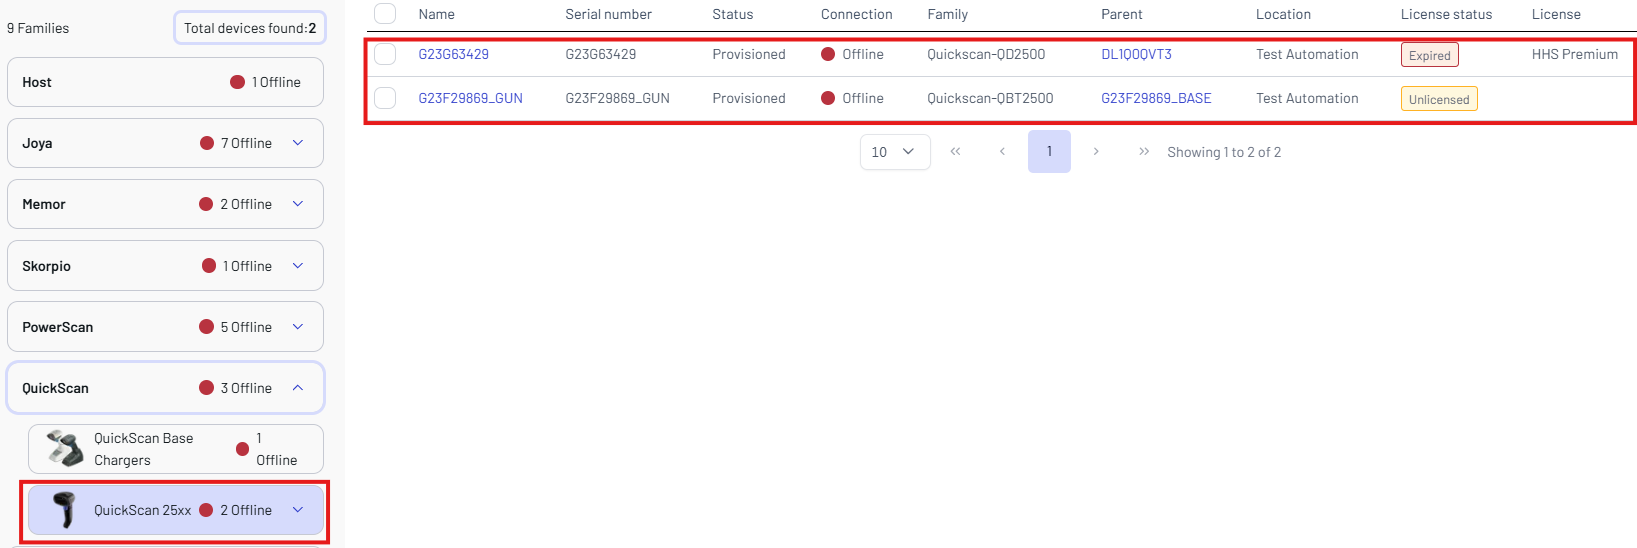
The first list on the left shows the devices arranged by product families. Click the arrow to expand a family group and display sub-families.
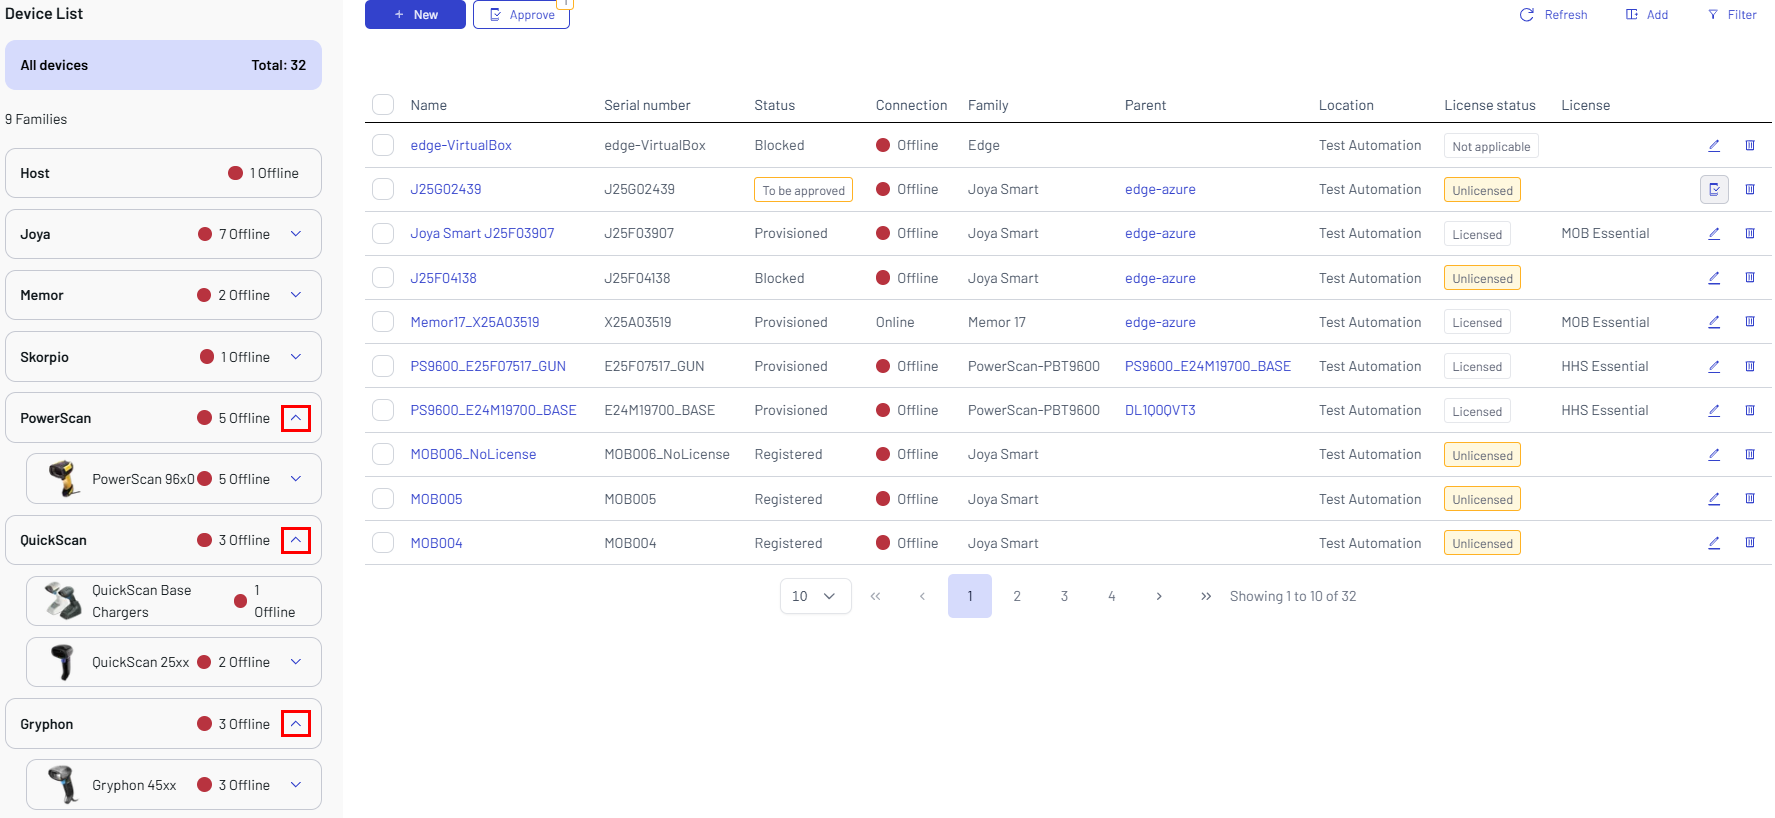
Click a sub-family to filter the related devices in the device visibility table.
To filter devices by location, click the Location filter button. Use the search bar to find specific locations.
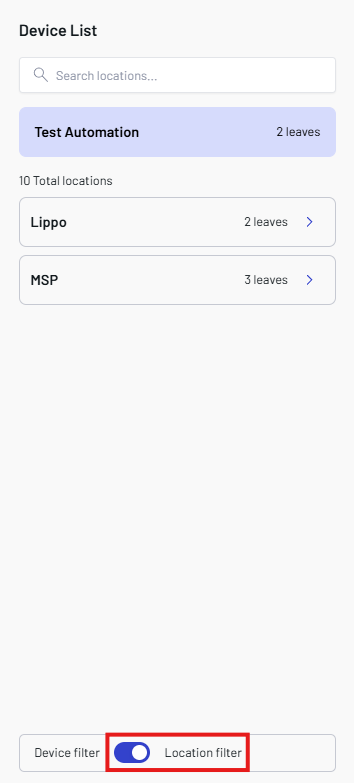
Expand a location to view its child locations.

The device visibility table shows the following information for each individual device:
- Name - the name assigned to the device.
- Serial Number - the device serial number.
- Status - the device status. The available values are:
- To be approved - the device has been added to the platform and is waiting for approval.
- Registered - the device is registered and enabled to receive messages.
- Blocked - the device is blocked and unable to function.
- Provisioned - the device has completed provisioning and can exchange data with Datalogic Connect.
- Connection - the device connection status (online/offline).
- Family - the device sub-family.
- Parent - the uplink device that it is connected to.
- Location - the location you assigned to the device.
- License status - the device's associated license status. The available values are:
- Licensed
- Unlicensed
- Expired
- Not applicable
- License - the device's associated license type. Refer to Licenses for more details.
Click the delete icon on the right to remove the selected device.
Add a new Device
This section explains how to add a new device to the Datalogic Connect web application.
Click New to add a device and fill in the device details.
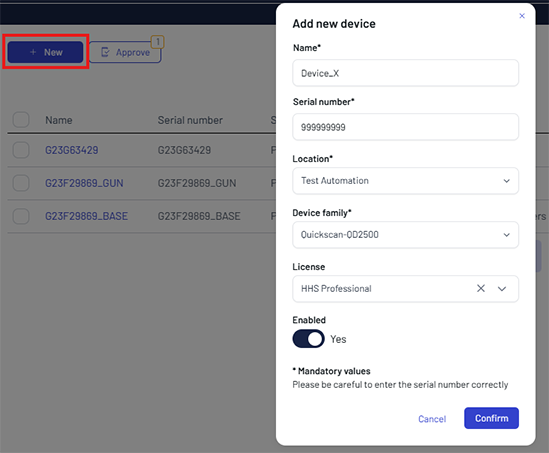
After you fill in the details, click Confirm to add the device to the platform.
Device details
- Name - enter a name for the device
- Serial Number - enter the device serial number
- Location - select the location from the dropdown list
- Device family - select the device family from the dropdown list
- License - select the license type (optional)
An unlicensed device can be approved, but it is unable to function.
Add an Edge Device
To add an IoT Edge device to the Datalogic Connect web application:
-
Click "+ New" to add a device and fill in the device details.
-
In the Device family dropdown, select Edge Device or the appropriate IoT Edge device type.
-
Fill in the required fields:
- Name - enter a name for your edge device
- Serial Number - enter an identification number for recognizing the edge device (your choice)
- Location - select the location from the dropdown list
- Active manifest - select the manifest that will differentiate this edge device for its role (e.g., edge, smart vision suite for retail)
- Device IP - enter the IP address of the edge device (it must be the same static IP as the one that will be configured on the device)
-
Click Confirm to add the edge device to the platform.
After creating the device, you can install the edge device by following the appropriate setup guide. The setup script can be downloaded on the device's Overview page using the Install script button. Here it can be chosen based on your operating system. In the same page, click Get Credentials to download the credentials required during installation. Then follow the setup guide for your deployment:
It is also available the register device option, which allows you to register a mobile device without going through the full setup process with Scan2Deploy Studio.
This option is only valid for devices that were already enrolled through Scan2Deploy Studio previously. It doesn't provide the full setup with the Connect Android application, but it allows the device to be recognized and managed by the Edge device if the enrollment code changes.
-
After adding the device, it will appear in the device list with its details and status. Here you can download for this Edge device the credentials file or the installation script.
The install script option is a compressed archive which includes the necessary script (for Linux or Windows with EFLOW) to set up the edge device, the README and the sha256 checksum file for verifying the integrity of the downloaded files.
Filter Settings
Click the Filter button to apply the filters to the table. You can filter your search by Name, Serial number, Status, Family (you can select one or more families or sub-families), Parent, Location, License status, and License.
To clear the selections, click Clean.
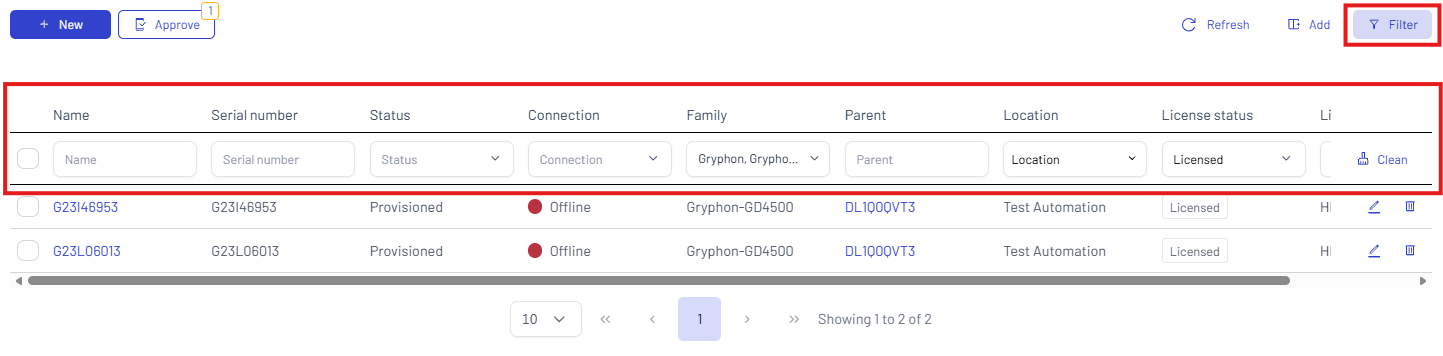
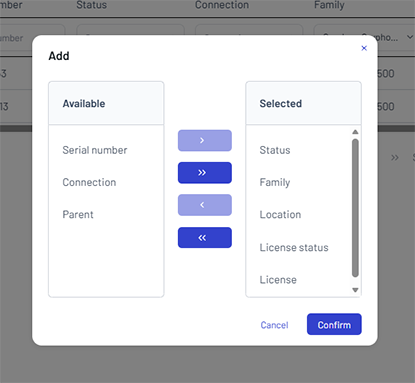
Click the Add button to show/hide one or more items.
Device Page
The Device page provides a comprehensive view of your connected device and its details.
Overview
The Overview page adds a new level of visibility to your connected device (e.g., Datalogic devices, Edge devices).
On this page, you can:
- View Device Properties: Monitor current status and configuration
- Send Commands: Control your device remotely
- Monitor Activity: Track device operations in nearly real-time
Edge Device Management
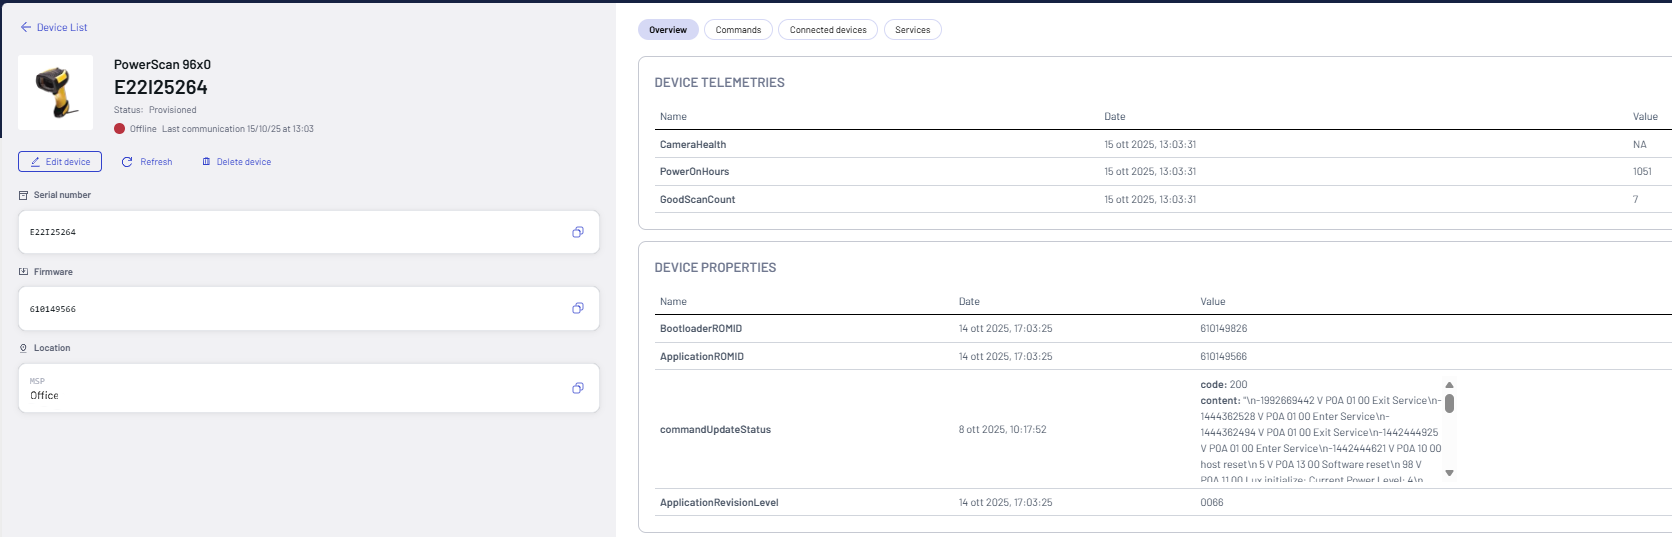
The edge Device Overview page provides information on the edge device's status.
Edge Device Credentials
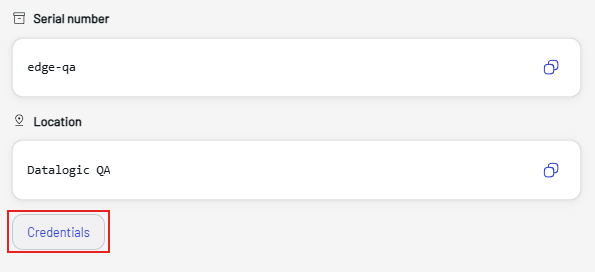
The Credentials tab displays the edge device's connection details. Use these credentials to connect your edge device to Datalogic Connect. For complete installation instructions, see the Ubuntu or Windows with EFLOW setup guide.
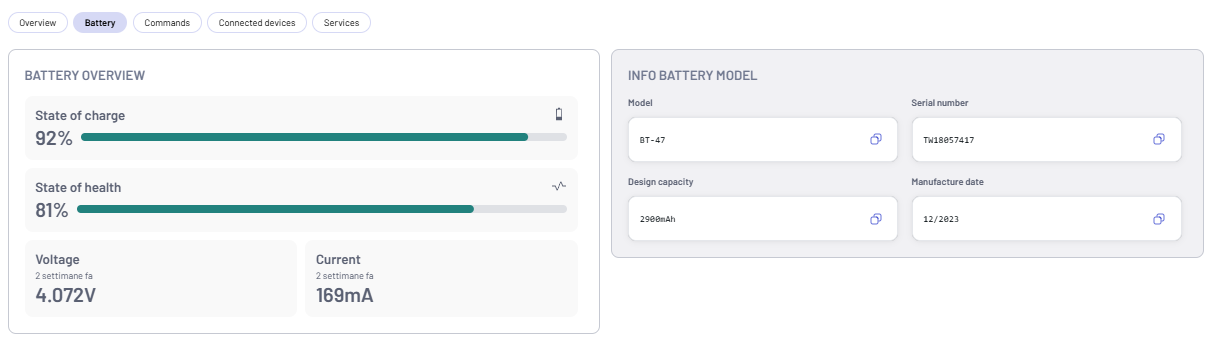
Battery Management
For wireless devices, access battery information through the Battery button:
- 🔋 Battery model specifications
- ⚡ Current charge status
- 📊 Health monitoring indicators
Commands
Mobile Computers
Mobile Computer Commands
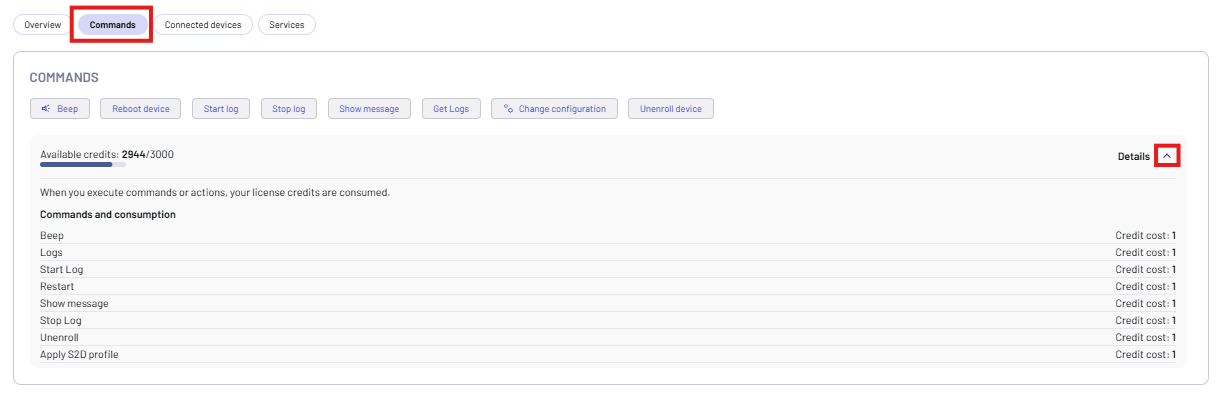
Click the Commands button to send a command to the device.
You can send the following commands to a Mobile Computer:
- Beep - makes the device beep.
- Reboot device - performs a reboot.
- Start log - begins a log session.
- Stop log - ends a log session.
- Show message - displays a message notification.
- Get Logs - displays the device logs.
- Change configuration - installs configuration changes.
- Unenroll device - disconnects the device from the platform.
You can also monitor your available license credits. Click Details to display the cost of each command.
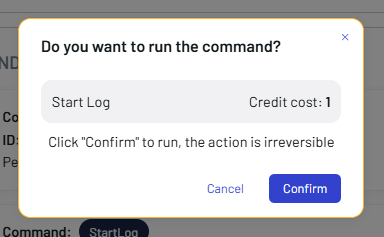
Click the related button to send a command, then click Confirm. The confirmation dialog shows the cost of the selected command.
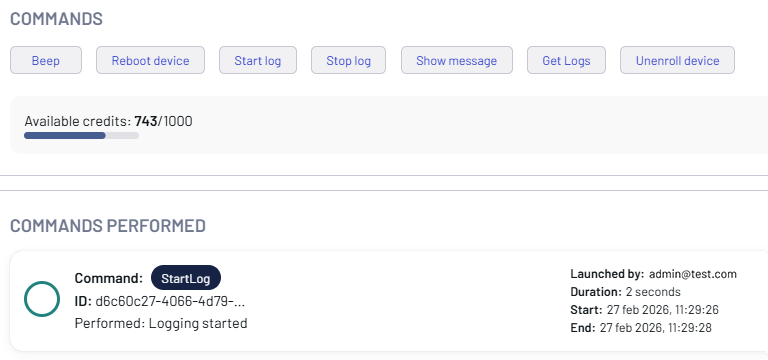
The result is shown in the COMMANDS PERFORMED box.
Mobile Computer Logs
To retrieve logs from the device, run the Start log command to initiate a log session, then run the Stop log command to terminate it.
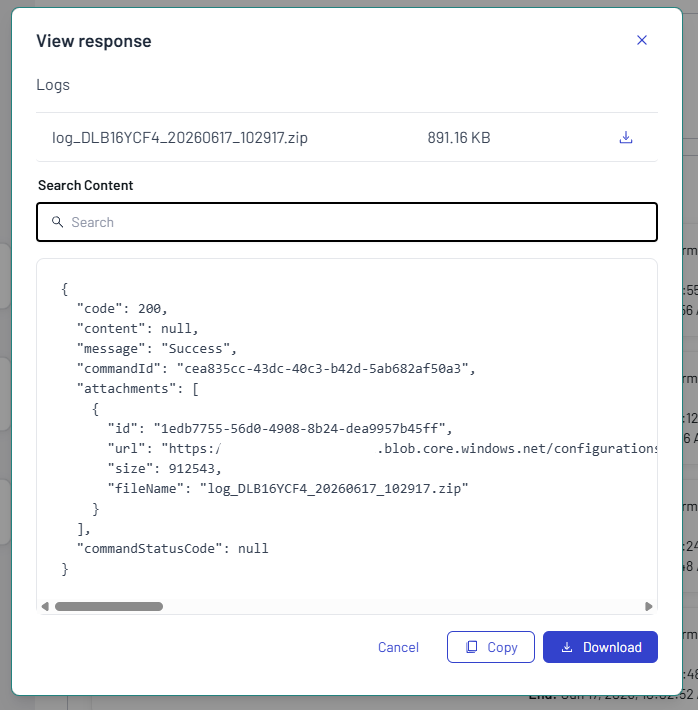
The Get Logs button retrieves the device logs from the mobile computer. Once the command is executed, click View response in the COMMANDS PERFORMED box to display and download the result as a ZIP file.

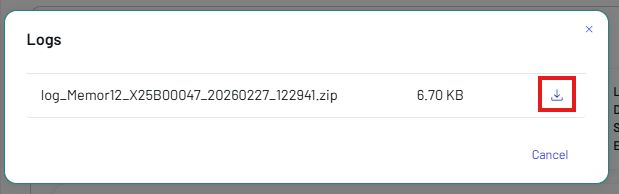
Mobile Computer Configuration
This feature is supported only on Datalogic mobile computers with a Professional license.
Click the Change configuration button to install configuration changes.
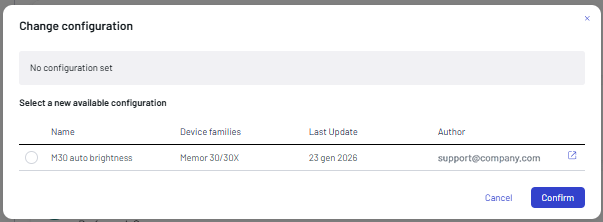
Click the external link icon on the right to display the configuration details.

Select a configuration, then click Confirm. To add a configuration to the platform, see Upload a Configuration.
Handheld Scanners
Handheld Scanner Commands
Click the Commands button to send a command to the device.
You can send the following commands to a Handheld Scanner:
- Beep - makes the device beep.
- Reboot device - performs a reboot.
- Get Logs - displays the device logs.
- Change configuration - installs configuration changes.
You can also monitor your available license credits. Click Details to display the cost of each command.
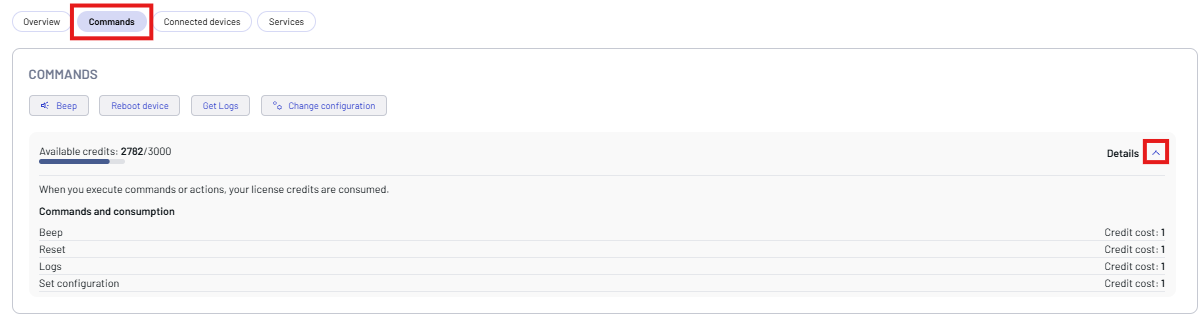
Click the related button to send a command, then click Confirm.
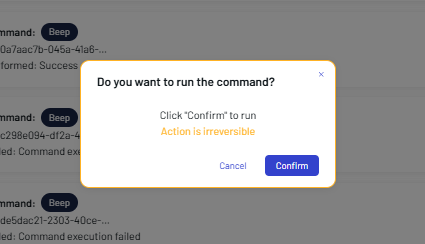
The result is shown in the COMMANDS PERFORMED box.

Handheld Scanner Logs
The Get Logs button retrieves the device logs from the handheld scanner. Once the command is executed, click View response in the COMMANDS PERFORMED box to display and download the result as a ZIP file.
Handheld Scanner Configuration
This feature is supported only on Datalogic Handheld Scanners with a Professional license.
Click the Change configuration button to install configuration changes.
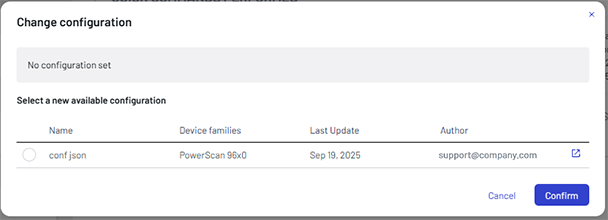
Click the external link icon on the right to display the configuration details.

Select a configuration, then click Confirm. To add a configuration to the platform, see Upload a Configuration.
Fixed Retail Scanners
Fixed Retail Scanner Commands
Click the Commands button to send a command to the device.
You can send the following commands to a Fixed Retail Scanner:
- Beep - makes the device beep.
- Reboot device - performs a reboot.
- Get Logs - displays the device logs.
- Change configuration - installs configuration changes.
You can also monitor your available license credits. Click Details to display the cost of each command.
Click the related button to send a command, then click Confirm.
The result is shown in the COMMANDS PERFORMED box.
Fixed Retail Scanner Logs
The Get Logs button retrieves the device logs from the fixed retail scanner. Once the command is executed, click View response in the COMMANDS PERFORMED box to display and download the result as a ZIP file.
Fixed Retail Scanner Configuration
This feature is supported only on Datalogic Fixed Retail Scanners with a Professional license.
Click the Change configuration button to install configuration changes.
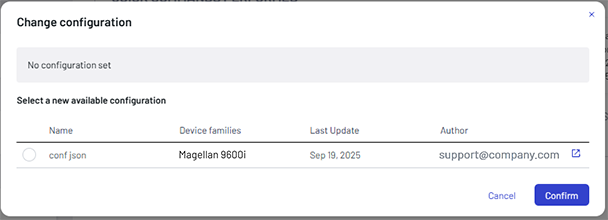
Click the external link icon on the right to display the configuration details.

Select a configuration, then click Confirm. To add a configuration to the platform, see Upload a Configuration.
Edge Devices
Click the Commands button to send a command to the device.
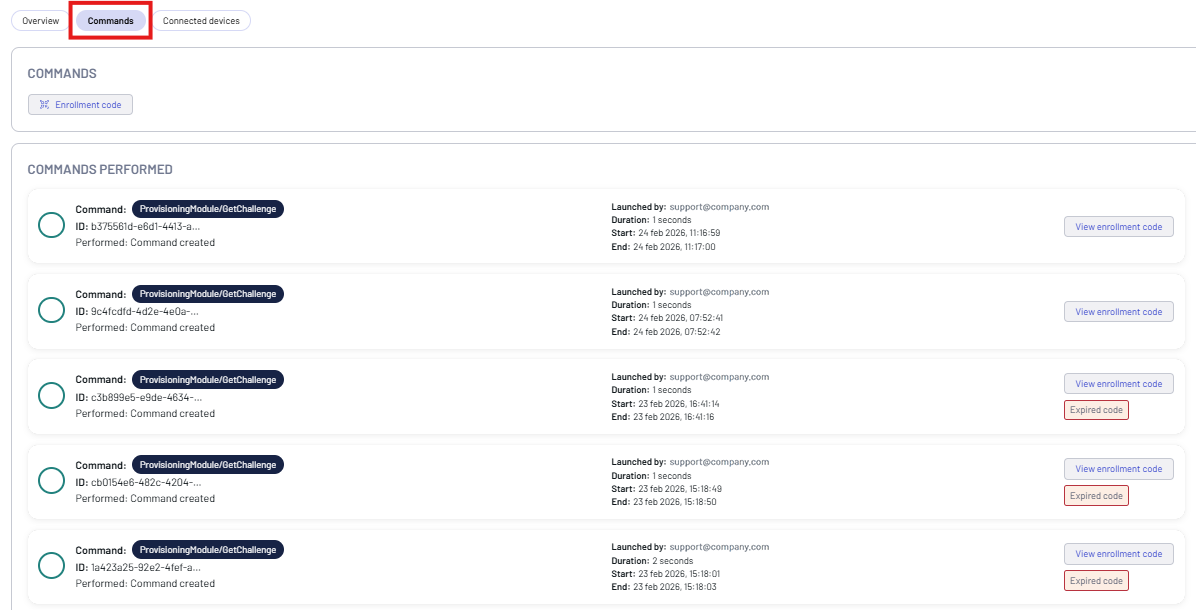
You can send the following command to an edge device:
- Enrollment code - generates a token that Scan2Deploy can use to enroll a mobile device through the selected edge device.
Click Enrollment code, then click Confirm.
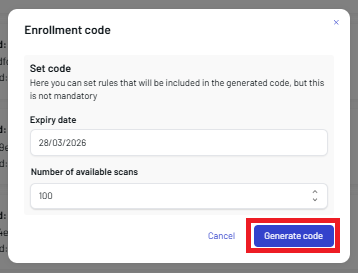
Enter the expiration date and the number of available scans, then click Generate code. The enrollment code is created and displayed on screen. Click the copy-to-clipboard icon and use the token when configuring a mobile device in Scan2Deploy. For the complete workflow, see Enroll a Mobile Device in Datalogic Connect.
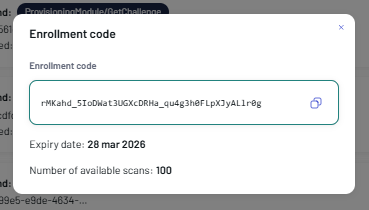
Leave the Expiry date and Number of available scans fields blank if you do not want the enrollment code to expire.
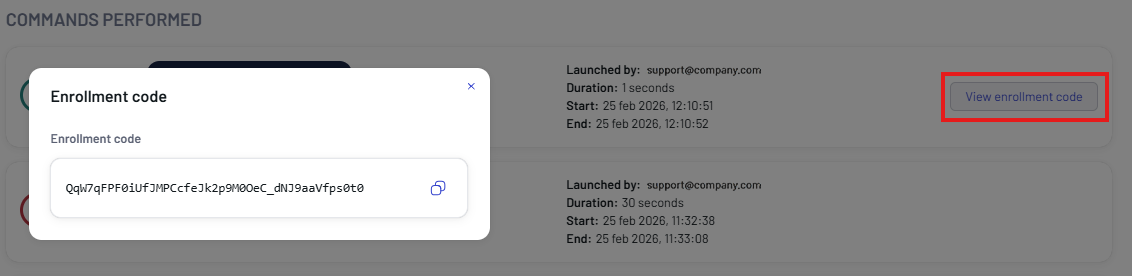
The result is shown in the COMMANDS PERFORMED box. Click the View enrollment code button to display the code again.
Host Devices
Host Device Commands
Click the Commands button to send a command to the device.
You can send the following commands to a host device:
- Reboot - performs a reboot.
- Get Logs - displays the device logs.
- Get configuration - retrieves and displays the active configuration settings.
Click the related button to send a command, then click Confirm.
The result is shown in the COMMANDS PERFORMED box.

Host Device Logs
The Get Logs button retrieves logs from the AladdinSDS service. Once the command is executed, click View response in the COMMANDS PERFORMED box to display and download the result as a ZIP file.
Host Device Configuration
Click the Get configuration button to retrieve the configuration applied on the AladdinSDS service.
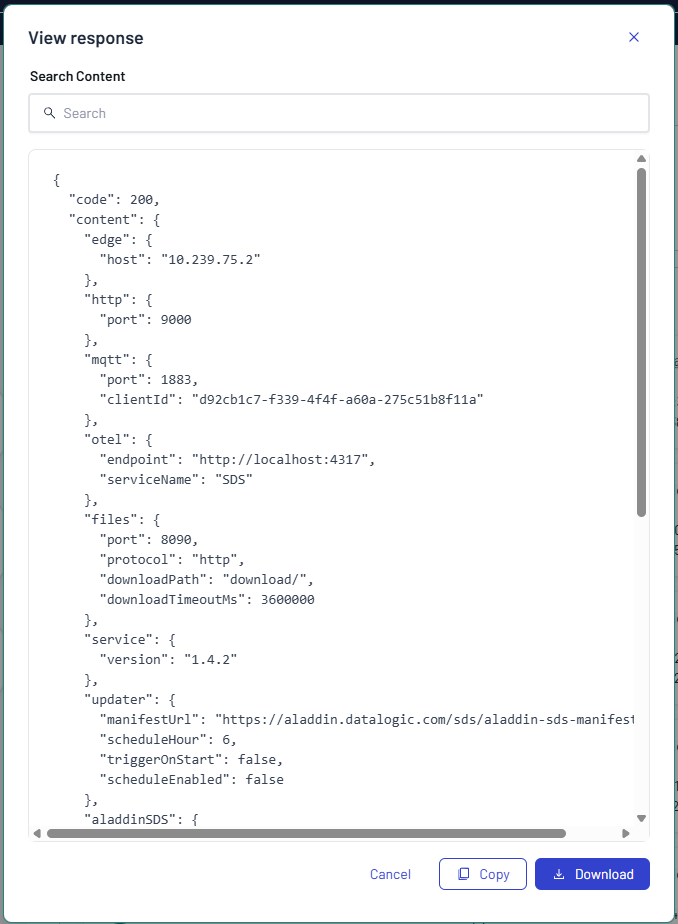
Refer to Aladdin SDS documentation for more details.
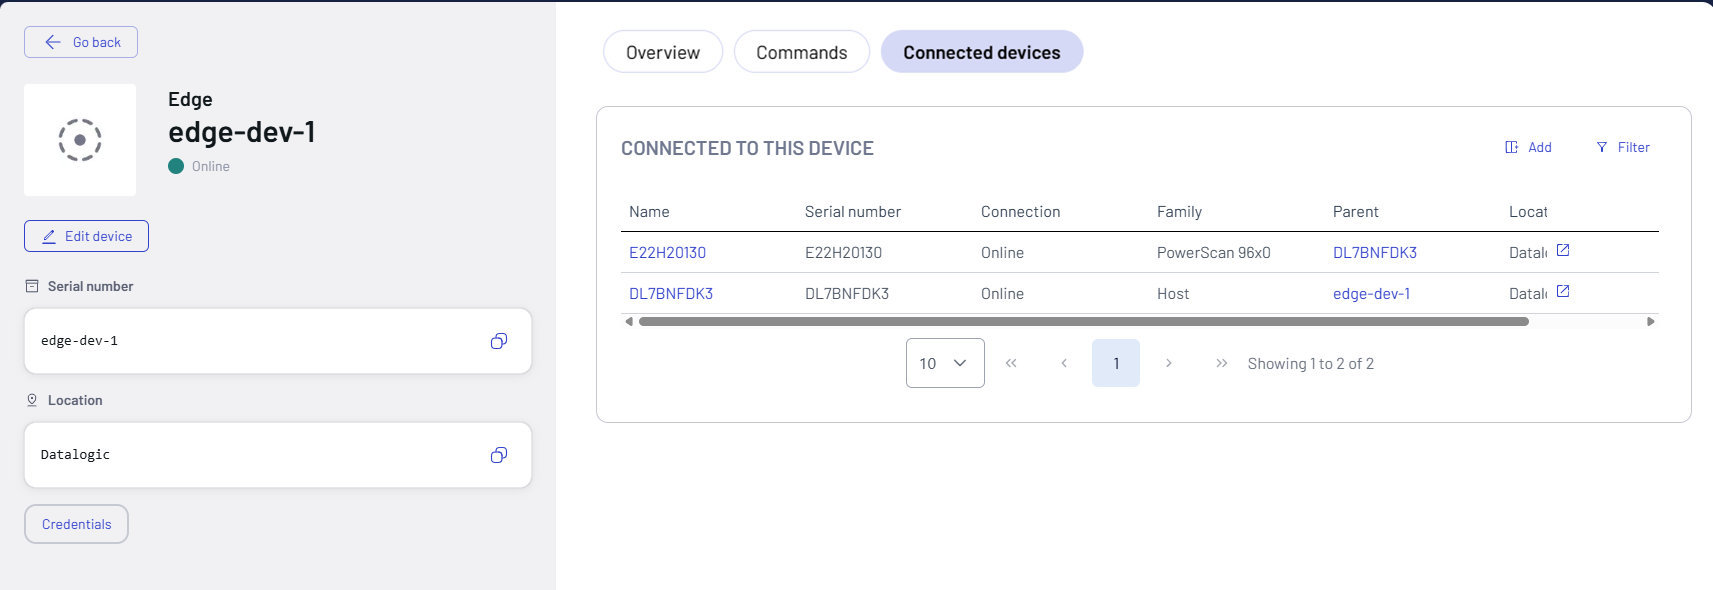
Connected Devices
The Connected Devices page provides a comprehensive view of all devices connected to a specific device (edge, host, base). This feature is particularly useful for understanding the device's topology and managing connected devices.
On this page, you can:
- View Connected Devices: See all devices connected to the selected device
- Monitor Connection Status: Check the status of each connected device
- Manage Connections: Go to the device's overview page for more details or actions
Services
The Services page shows all the RMAs related to a specific device.
The table below shows the details of the customers' return requests received for the selected device.
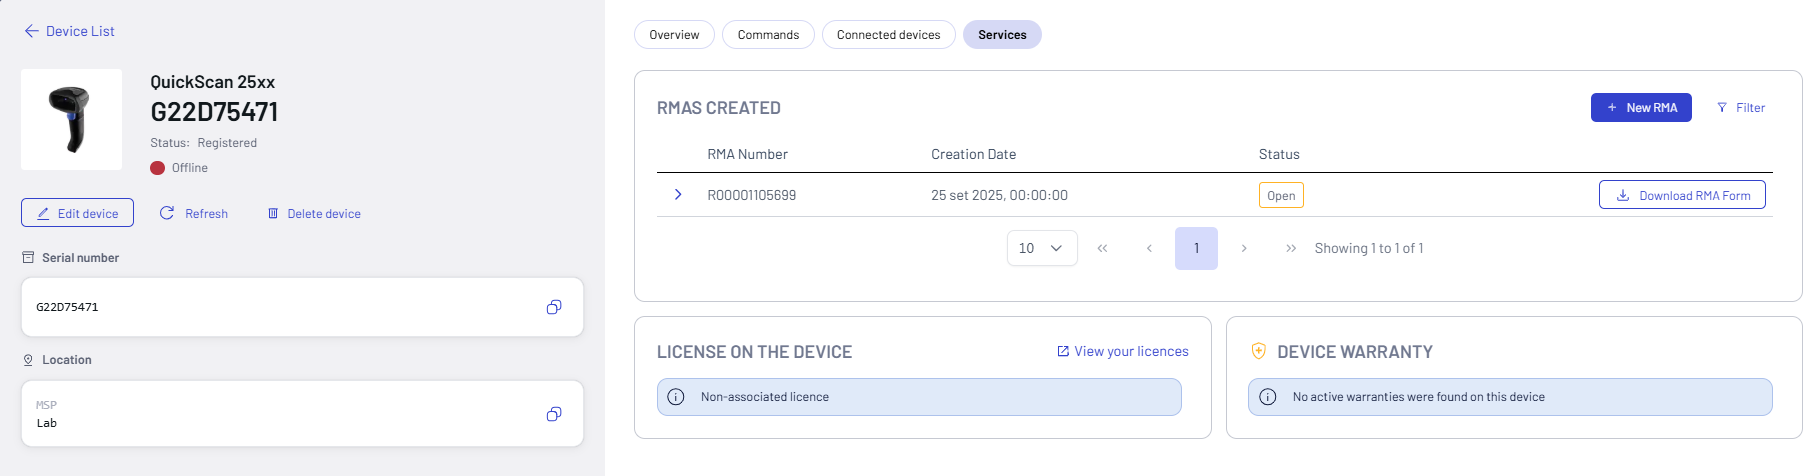
The RMA number is the unique code assigned to each returned item.
The Status can be:
- Open - The request was received and is waiting for input from a support team.
- Processing - The request is being processed but has not been completed.
- Complete - The request's task has been completed successfully. Click the Download RMA Form button to download the RMA Form.
Click the Filter button to apply the filters to the table. You can filter your search by RMA Number, Creation Date, and Status.

Click the New RMA button to create a new RMA.
Remote Control
This feature is supported only on Datalogic mobile computers with a Premium license.
The Remote Control feature lets you access, view, and control deployed mobile computers. Key capabilities include real-time screen sharing, remote device control, file explorer access, clipboard management, task monitoring, volume control, screenshot capture, and custom command execution.
To enable the Remote Control feature, follow these steps:
-
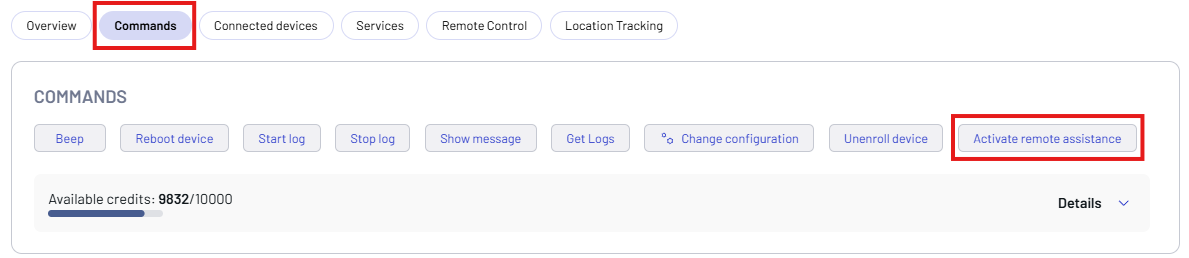
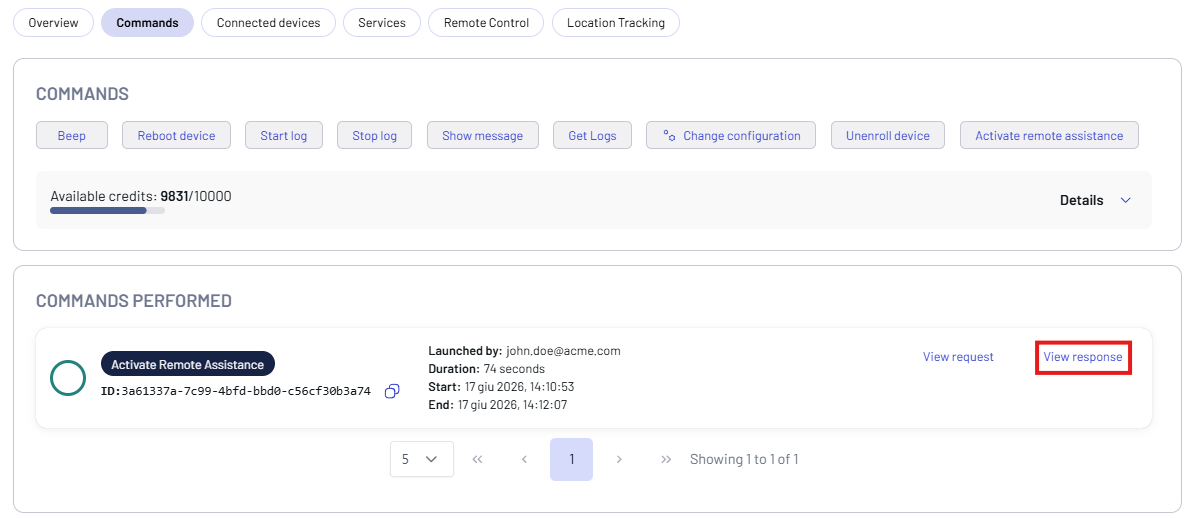
Click the Activate remote assistance button on the Commands tab.
-
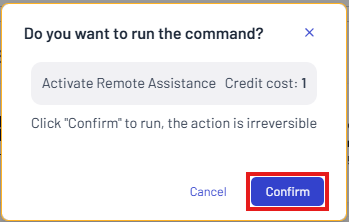
Click Confirm.
-
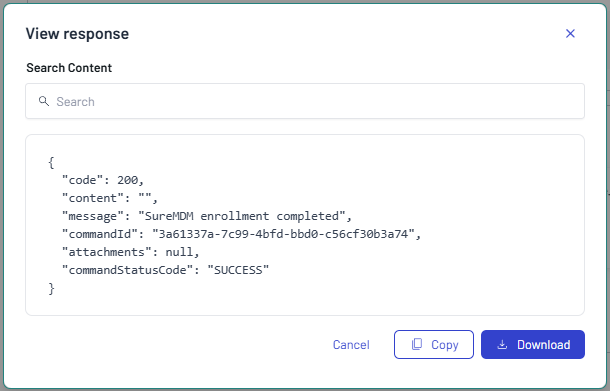
Click View response to display a report of the command.
-
Click Copy to copy the report, or click Download to download it.
Remote Control Screen
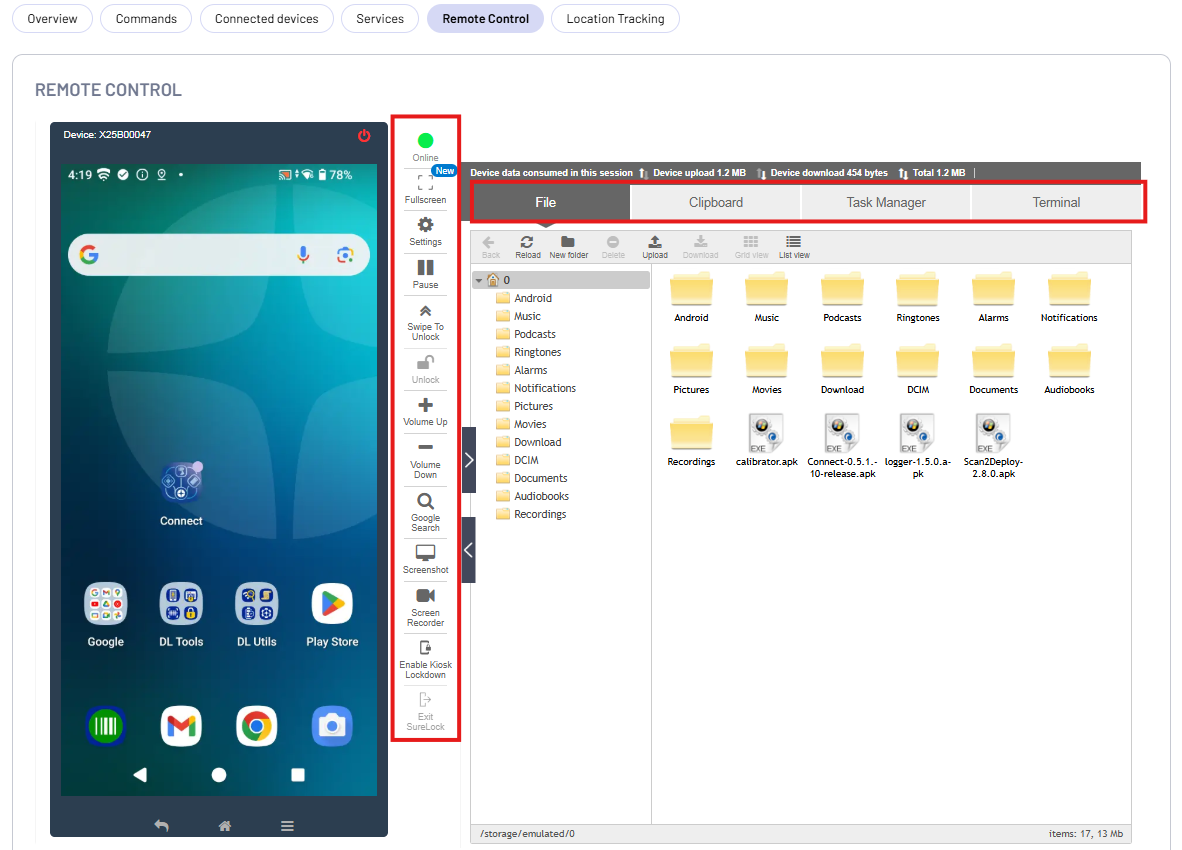
The remote screen is displayed on the left side of the Remote Control screen. The right side of the screen has the following options:
- File - Access files stored on the end user's device.
- Clipboard - Send, read, and clear text from the device clipboard.
- Task Manager - Monitor CPU usage, RAM usage, processes, and applications running on the remote device.
- Terminal - Use the command line to send commands and run scripts on Android devices.
The Remote Control Bar provides real-time session management utilities, display optimization settings, device hardware simulations, and dedicated security controls for managing deployed mobile computers.
- Online (Device Status): Displays the live connection state of the mobile computer. It confirms if the device is actively communicating with the console.
- Fullscreen: Expands the remote session window to full-screen mode for better visibility and precise troubleshooting.
- Settings: Opens configuration options to rotate the screen view or adjust screenshot image quality.
- Play / Pause: Starts or freezes the real-time screen sharing action. Pausing the stream maintains the session connection while stopping live data consumption.
- Swipe to Unlock: Simulates a swipe gesture on the remote display. Device authentication and management policies still apply.
- Unlock: Sends the supported wake or unlock action to the managed mobile computer.
- Volume Up / Down: Remotely increases or decreases the device volume.
- Google Search: Opens the search field available in the remote-control interface.
- Screenshot: Captures and downloads a screenshot in WebP format.
- Screen Recorder: Records real-time session video clips of the device screen.
- Enable Kiosk Lockdown: Remotely triggers and applies the SureLock profile layer on the target mobile computer, converting it into a locked-down multi-app or single-app enterprise kiosk.
- Exit SureLock: Disables the active lockdown environment from the console, restoring standard operating system layout access to the technician for deeper configuration changes.
Location Tracking
This feature is supported only on Datalogic mobile computers with a Premium license.
Use the Location Tracking feature to remotely enable and manage location services on enrolled devices. Administrators can configure custom update intervals to control the frequency of location data syncing.
Location Tracking is disabled by default. Click On to enable it.

Configure the Location Tracking Settings:
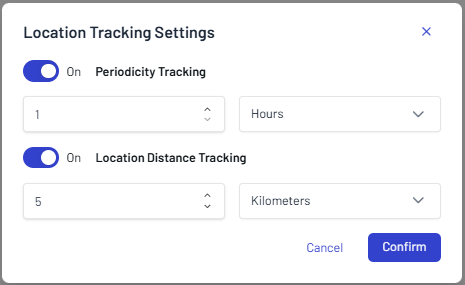
- Periodicity Tracking: Enabled (Location updates will trigger automatically at set time intervals).
- Location Distance Tracking: Enabled (Location updates will trigger whenever the device moves past a specified distance threshold).
You can adjust these settings at any time by clicking the Settings button in the top-right corner of the Location Tracking screen.
Location Tracking Screen
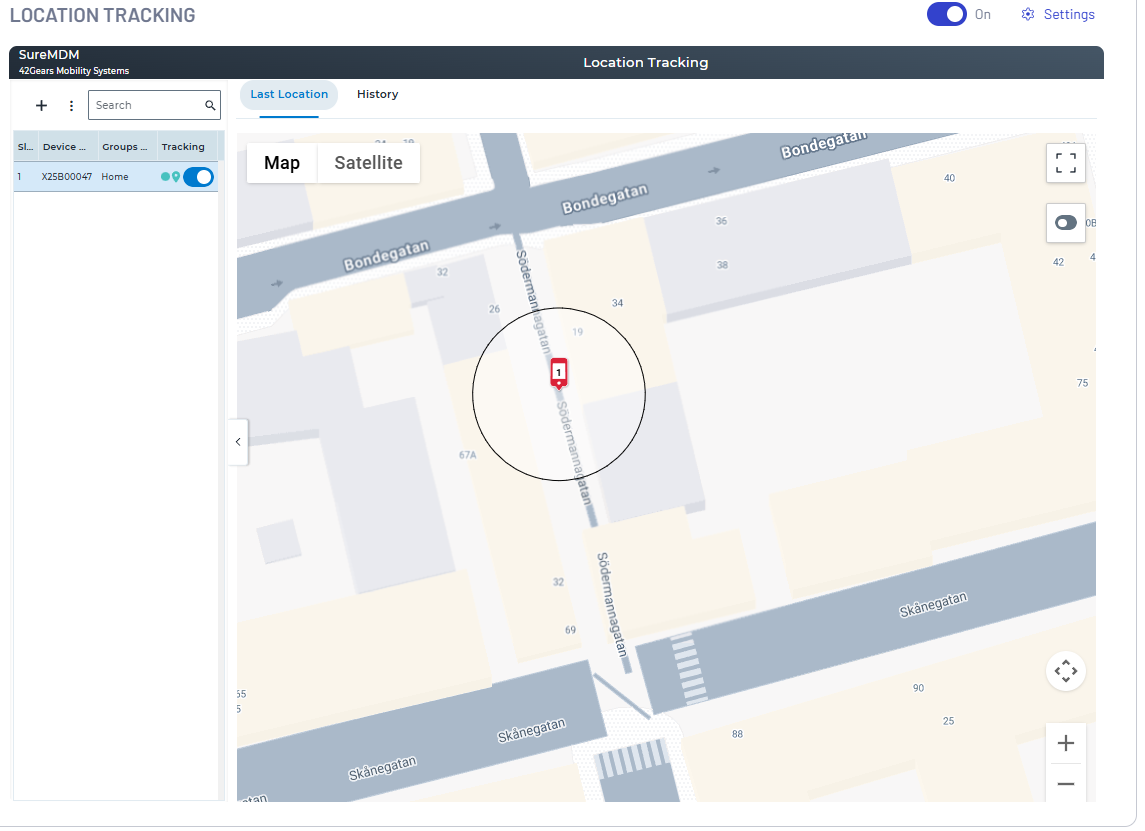
The dashboard provides three distinct methods for tracking and auditing the geographic positions of enrolled mobile computers:
- Last Location: Displays the most recent coordinates sent by the mobile computer during its last scheduled sync.
- Live Location: Initiates a real-time, on-demand tracking session that updates the device's position continuously on the map.
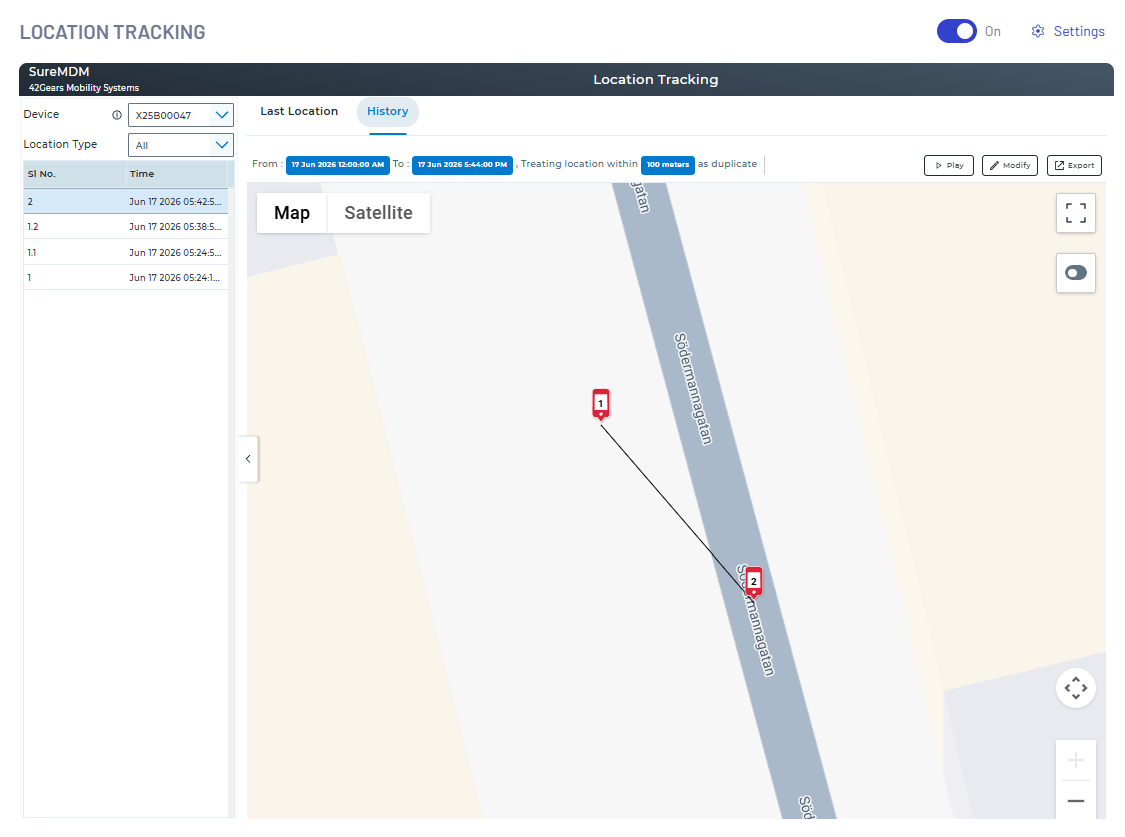
- History: Logs and maps historical route data over a specified date and time range. It visualizes the exact path traveled by the device. The Play button allows administrators to animate and visually audit the exact route taken by a mobile computer over a selected timeframe.